

Google Tag Manager Express Setup
Pre-Integration Checklist
impact.com has three tags you need to load into your GTM container: the Universal Tracking Tag (UTT), Identify Function, and the trackConversion function. You want the Universal Tracking Tag (UTT) to load first, followed by the Identify Function, then fire the trackConversion function. You will also need to set up a page view trigger to ensure these tags fire correctly.
The Universal Tracking Tag
Follow the instructions below to load the impact.com UTT tag into the GTM container.
Load the UTT into the GTM container.
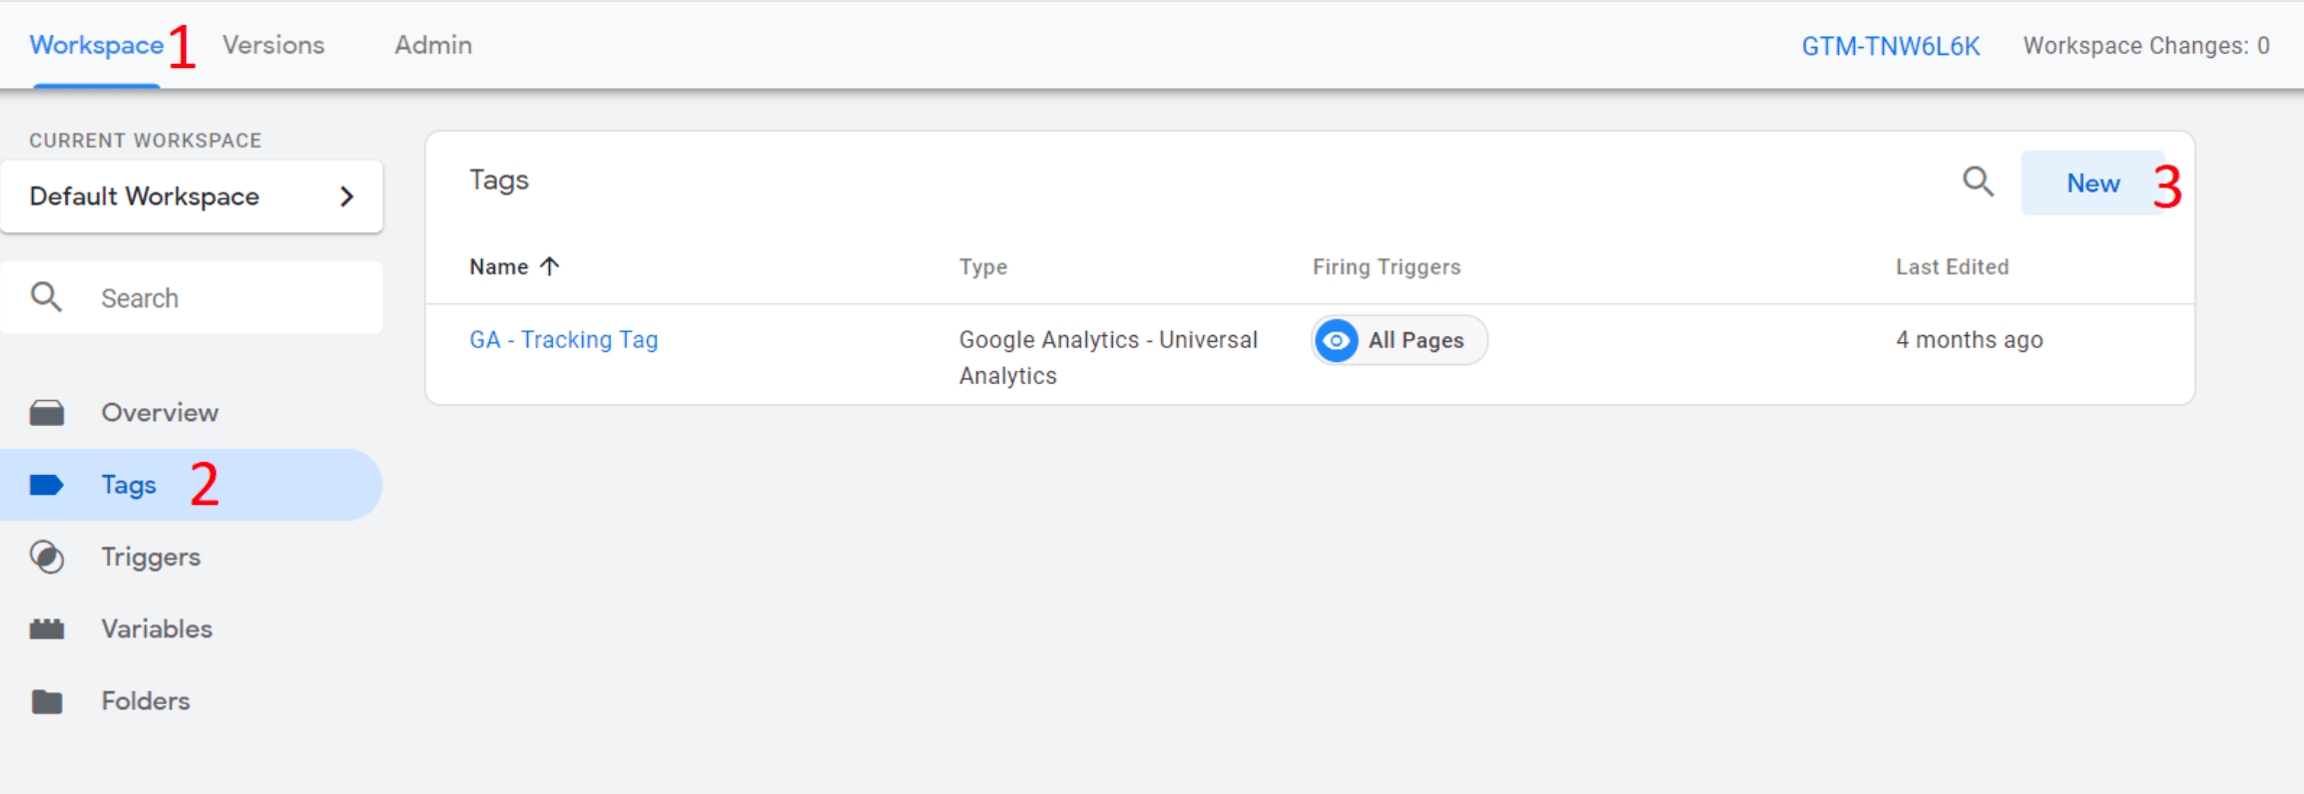
From the Workspace dashboard in GTM, select Tags → New.
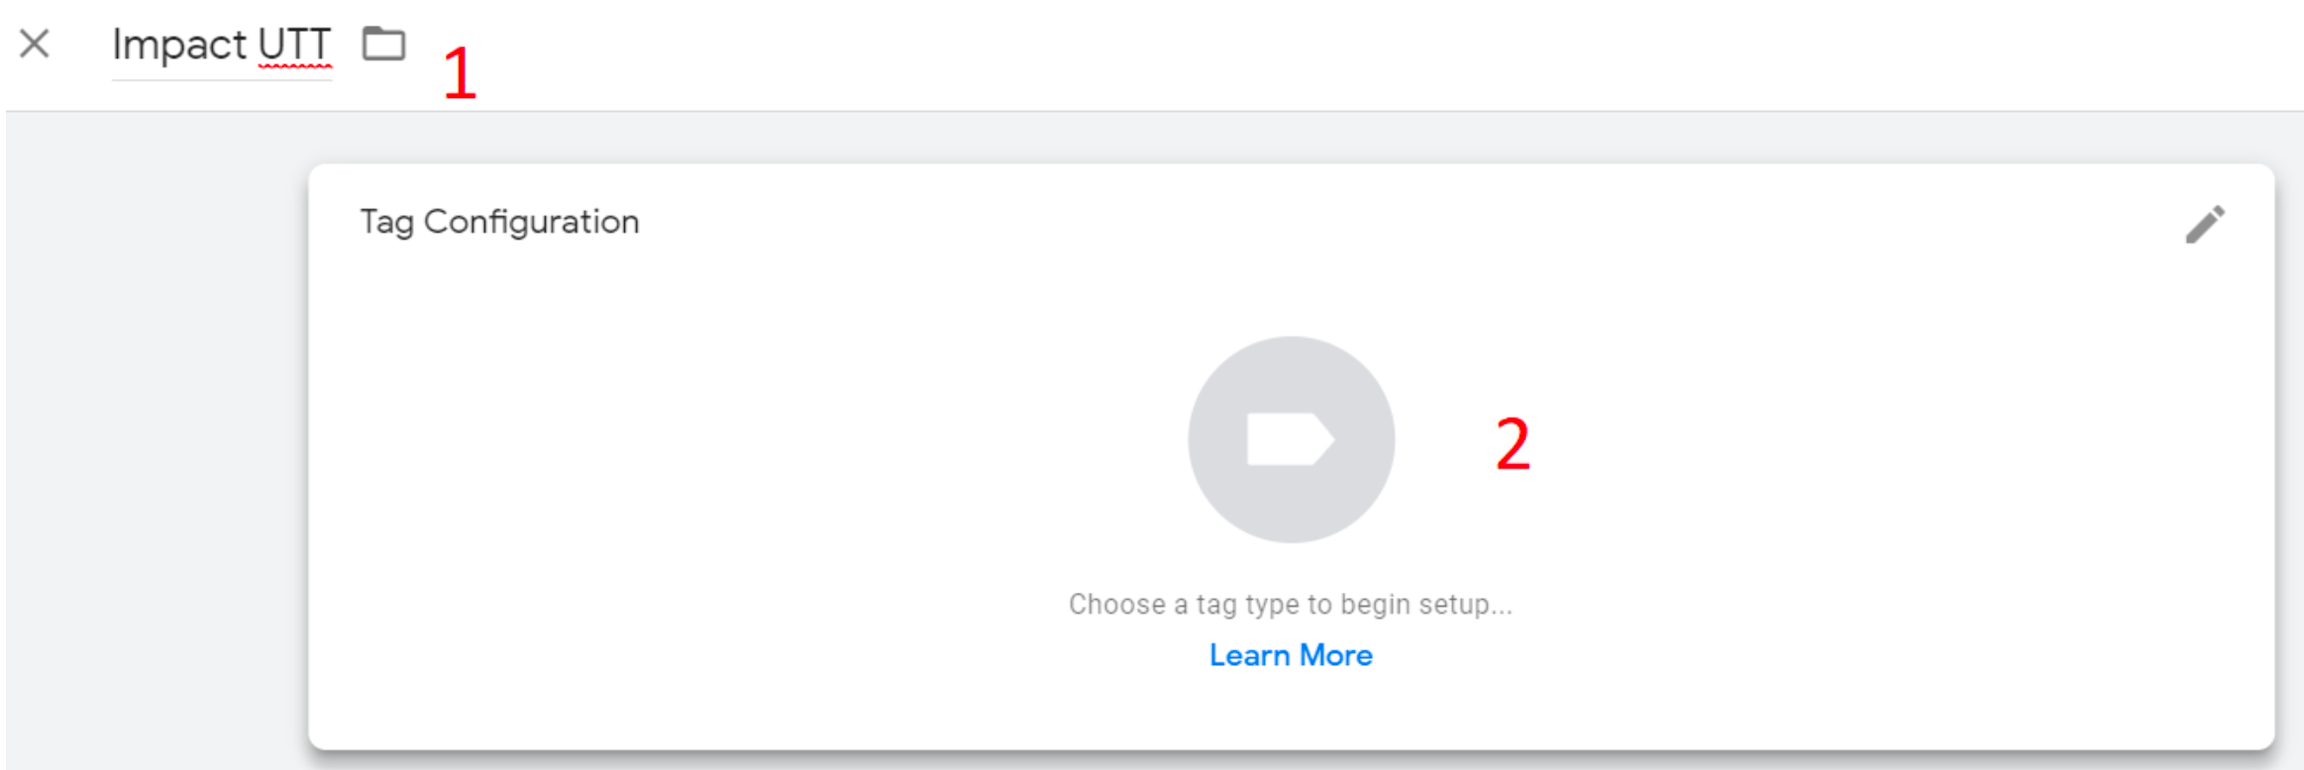
Give the tag a name (e.g. Impact UTT), then select Tag Configuration.
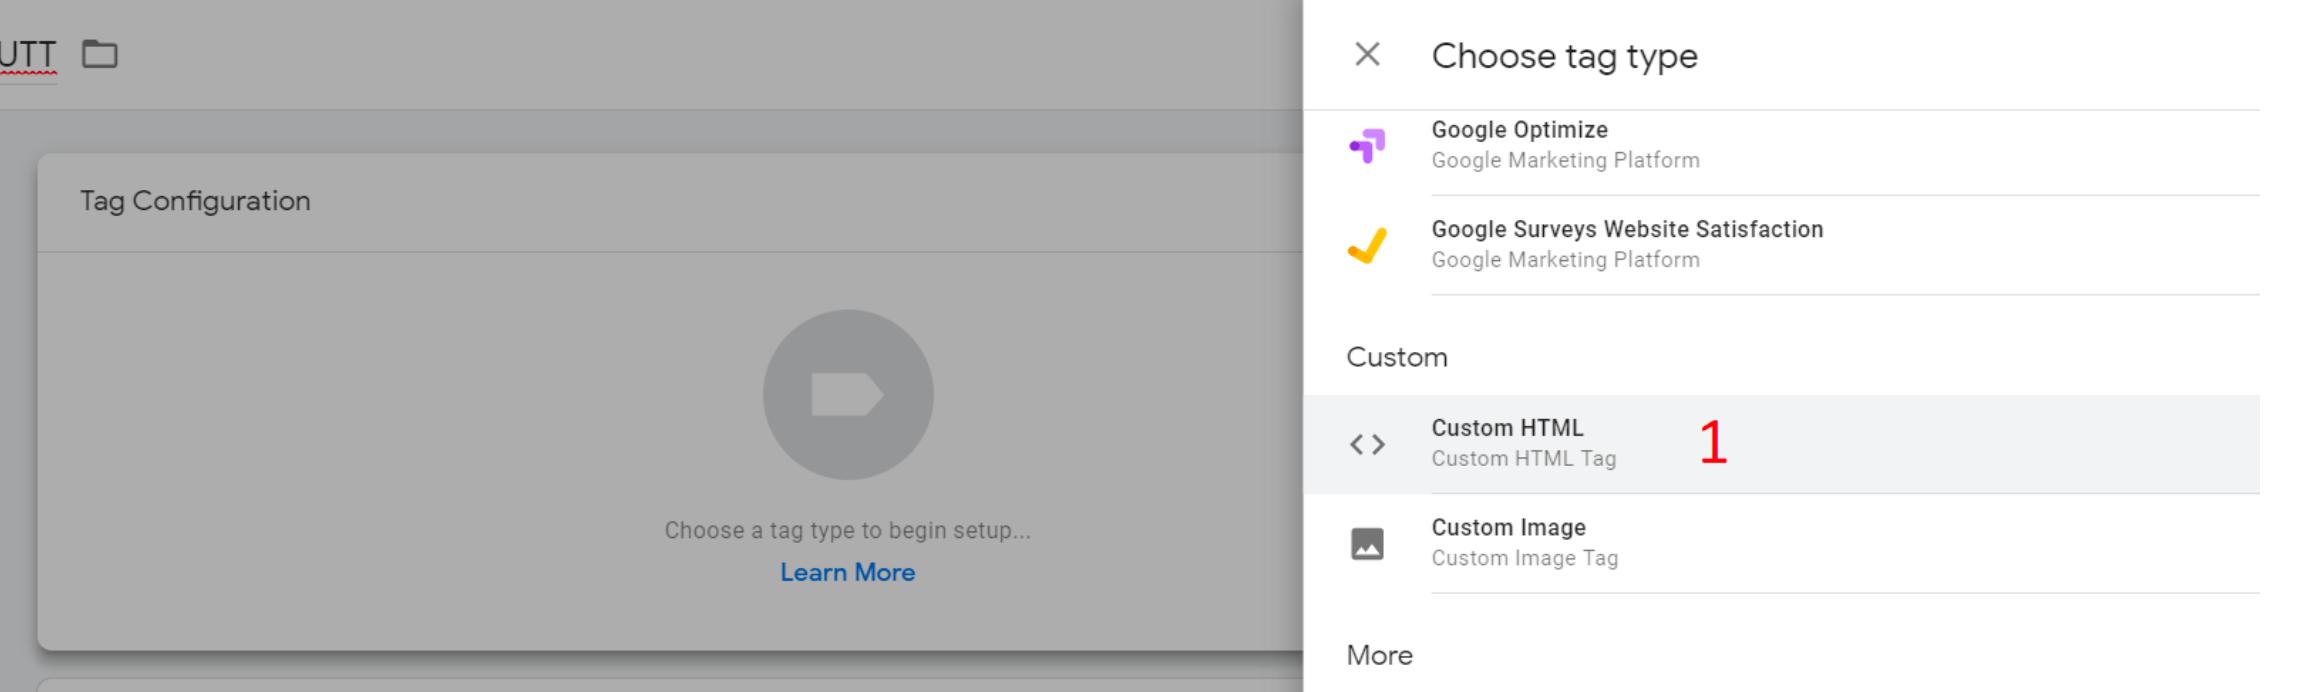
Under the Choose tag type section, select Custom HTML.
Copy the impact.com Universal Tracking Tag script from the table below and paste it into the empty HTML field.
Universal Tracking Tag
From the top navigation bar, select  [User profile] → Settings → General. Paste your entire unique UTT code into this field.
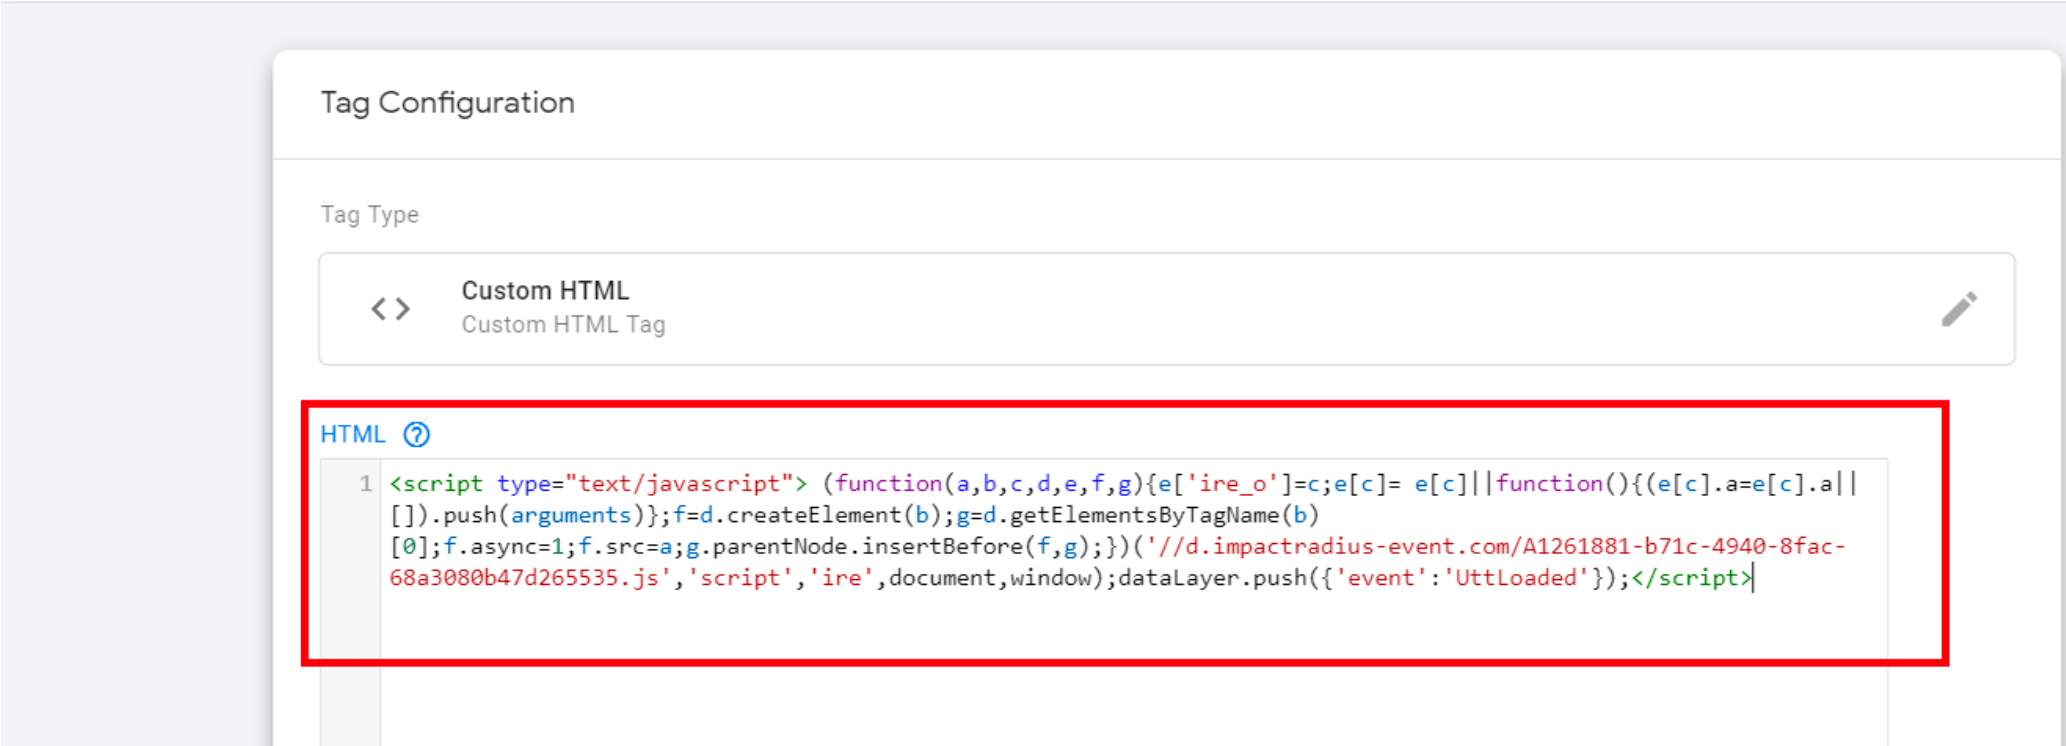
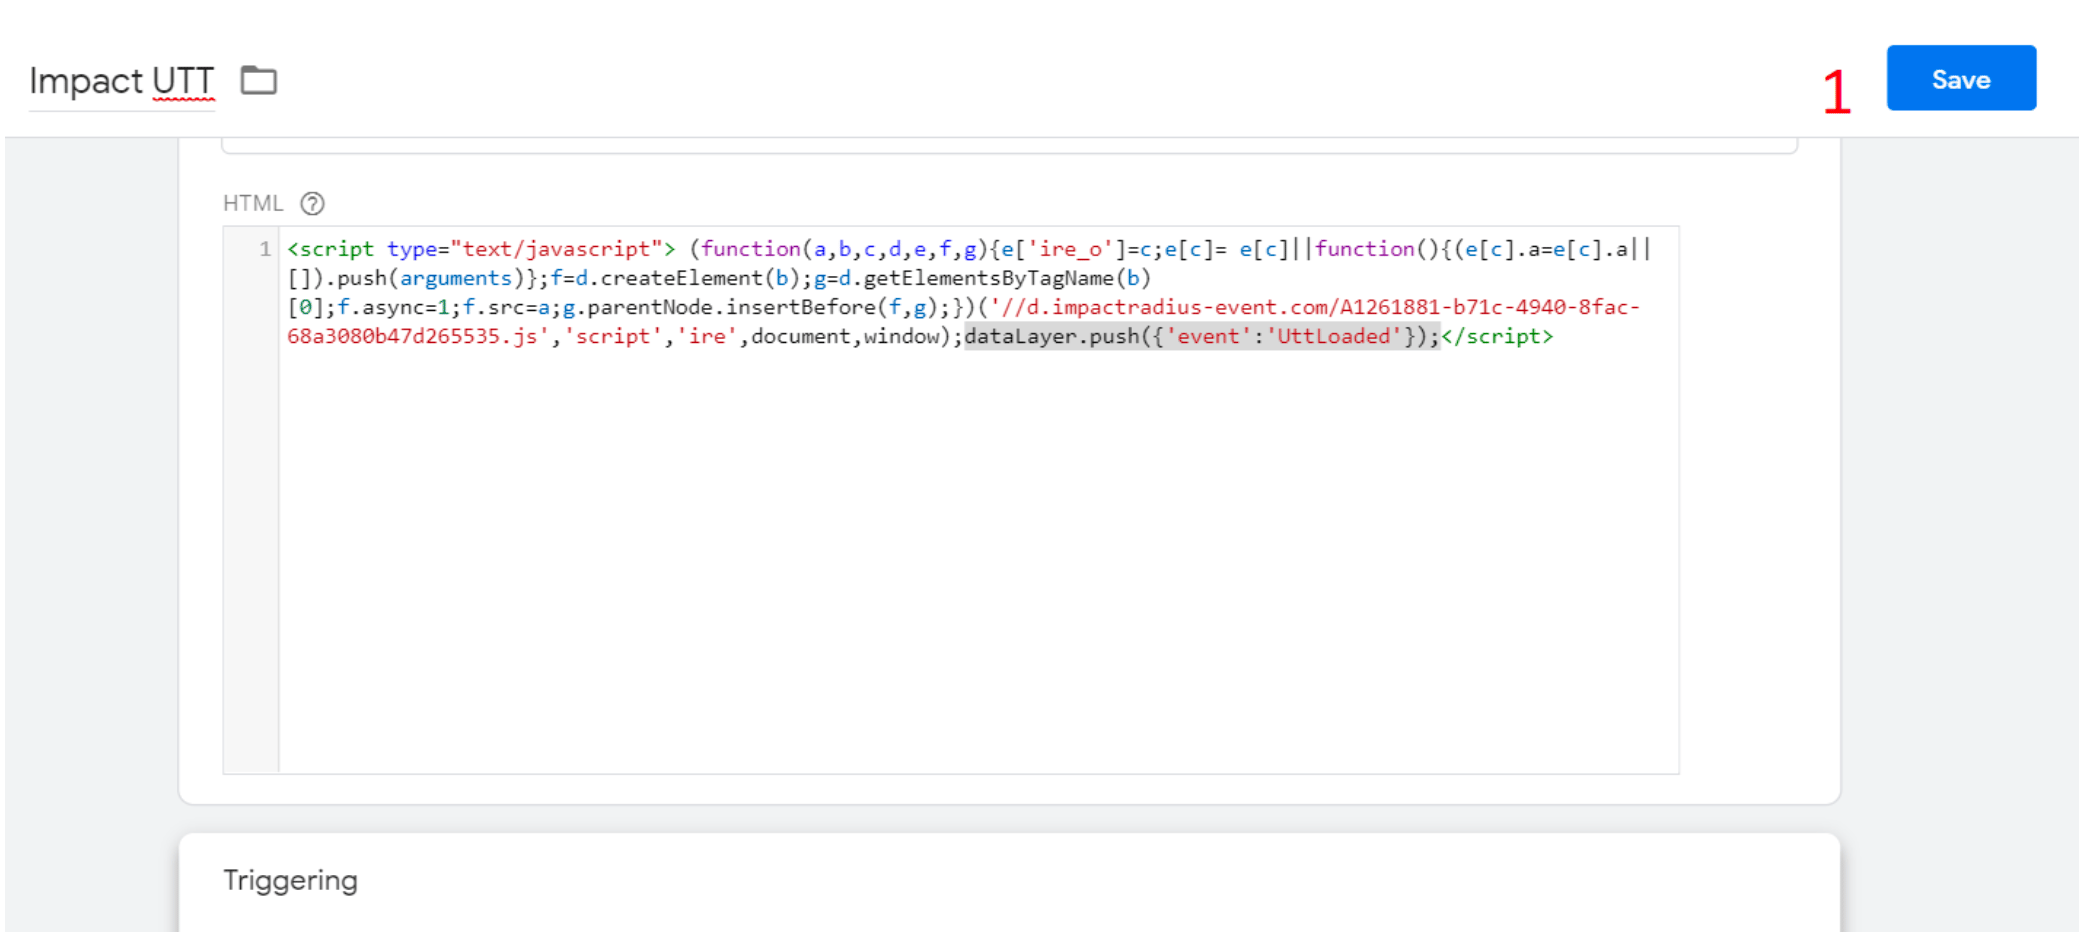
Before the closing
</script>tag, add the following line:dataLayer.push({'event':'UttLoaded'});We will get to what this function does shortly. Your final impact.com UTT script should look similar to this:

Next, select Triggering panel → All Pages.
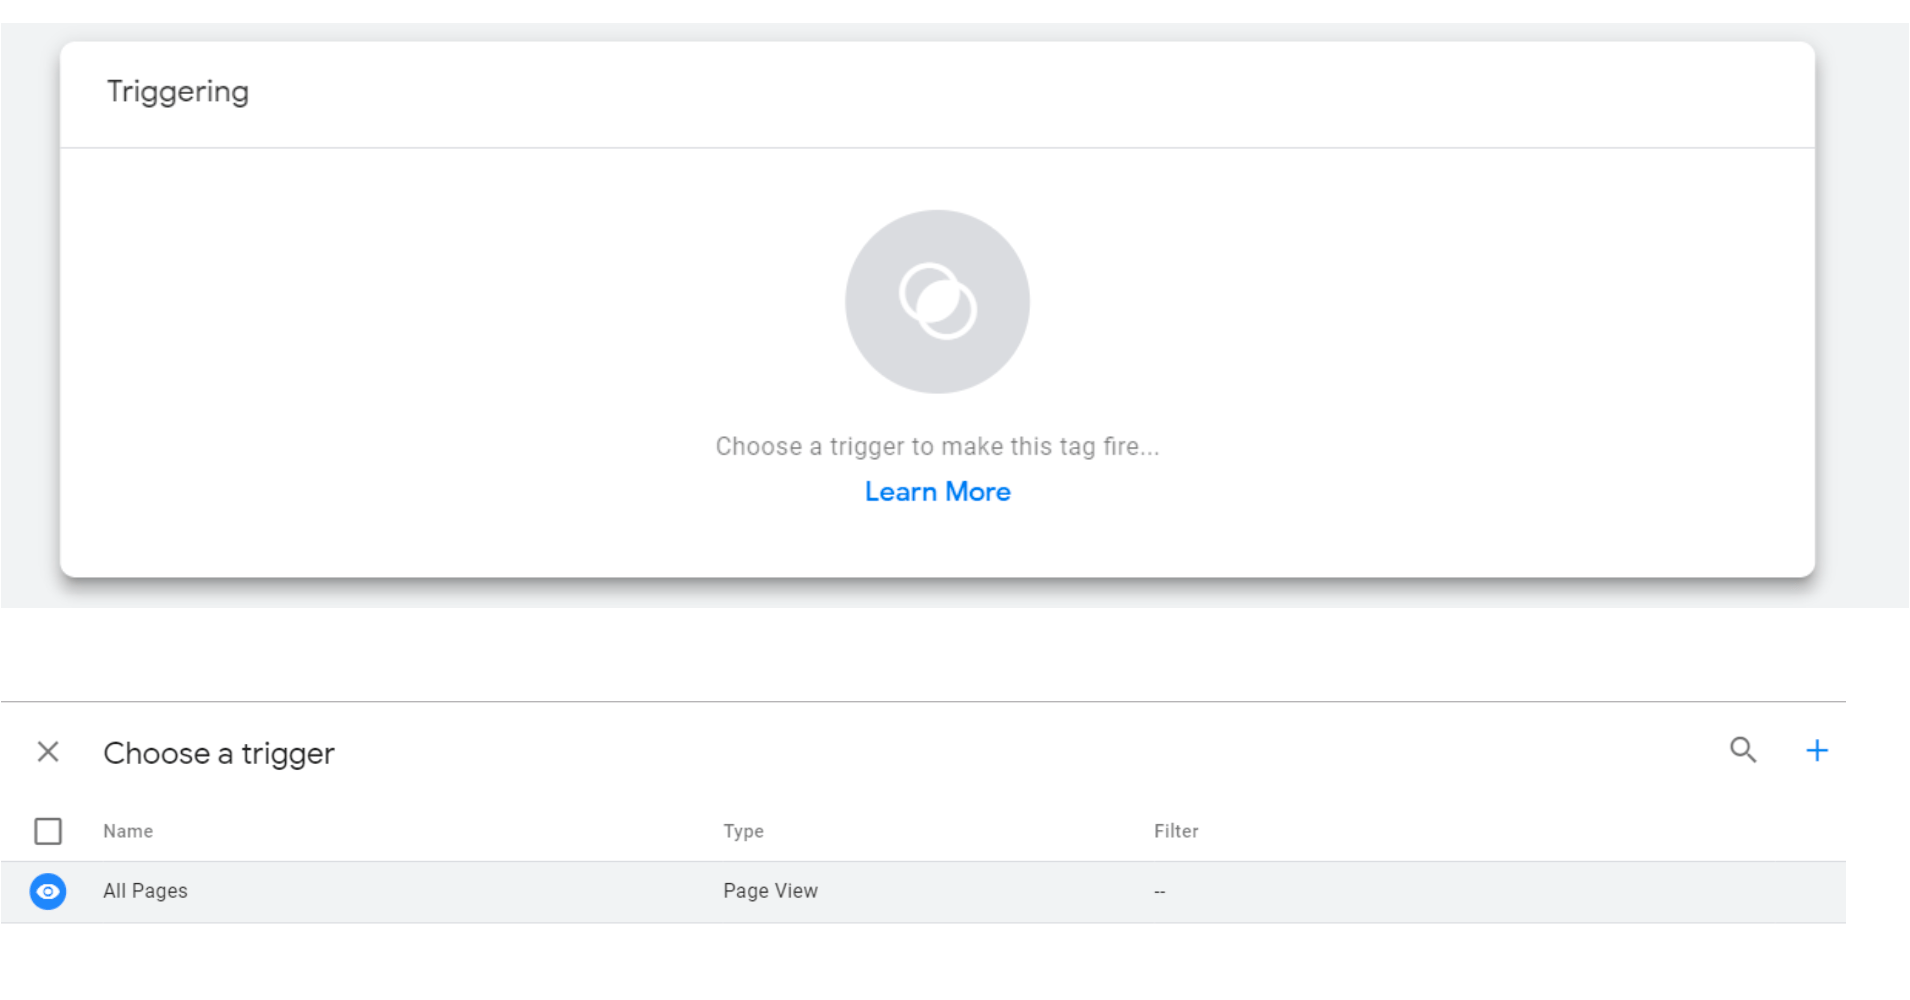
Navigate back to the tag preview screen and select Save.
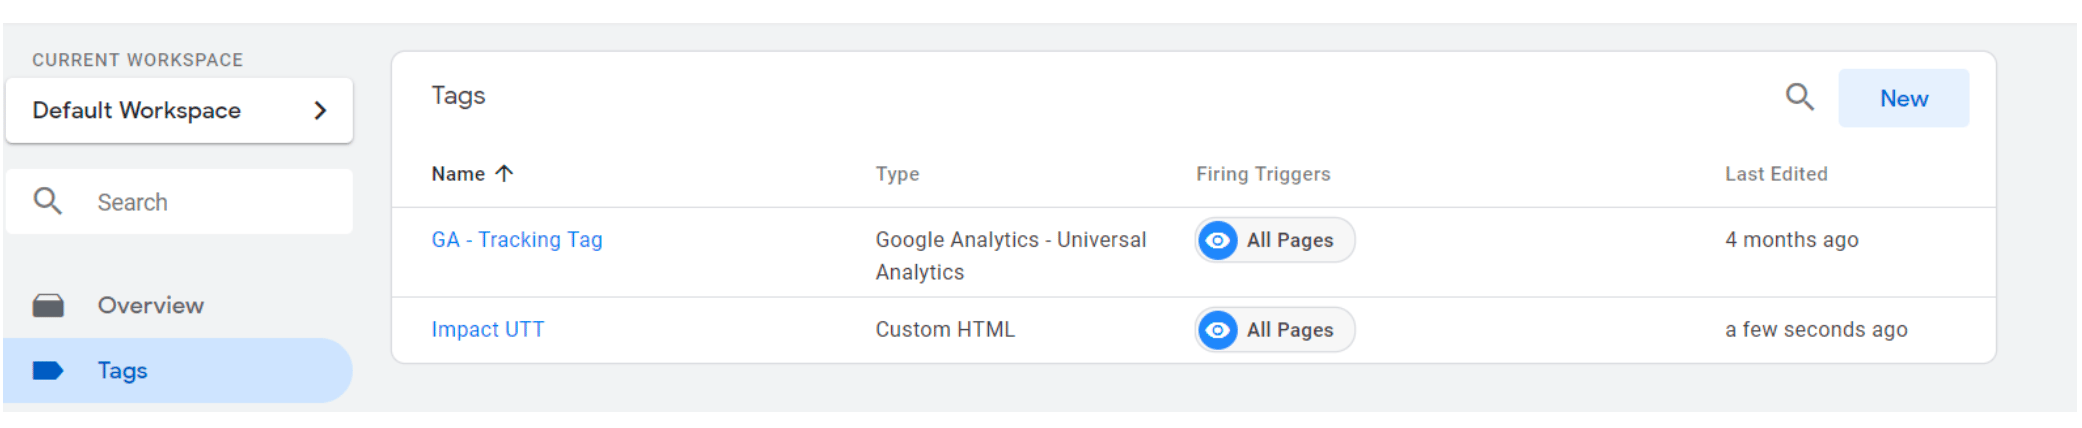
Your dashboard tag workspace should look similar to this:
Set up data layer variables
Once you have the key that you would like to work with, you can proceed to create a data layer variable.
For this scenario, the keys used will be the customer id and customer email values from the customer details data layer.
Follow the instructions below to create data layer variables in your GTM workspace:
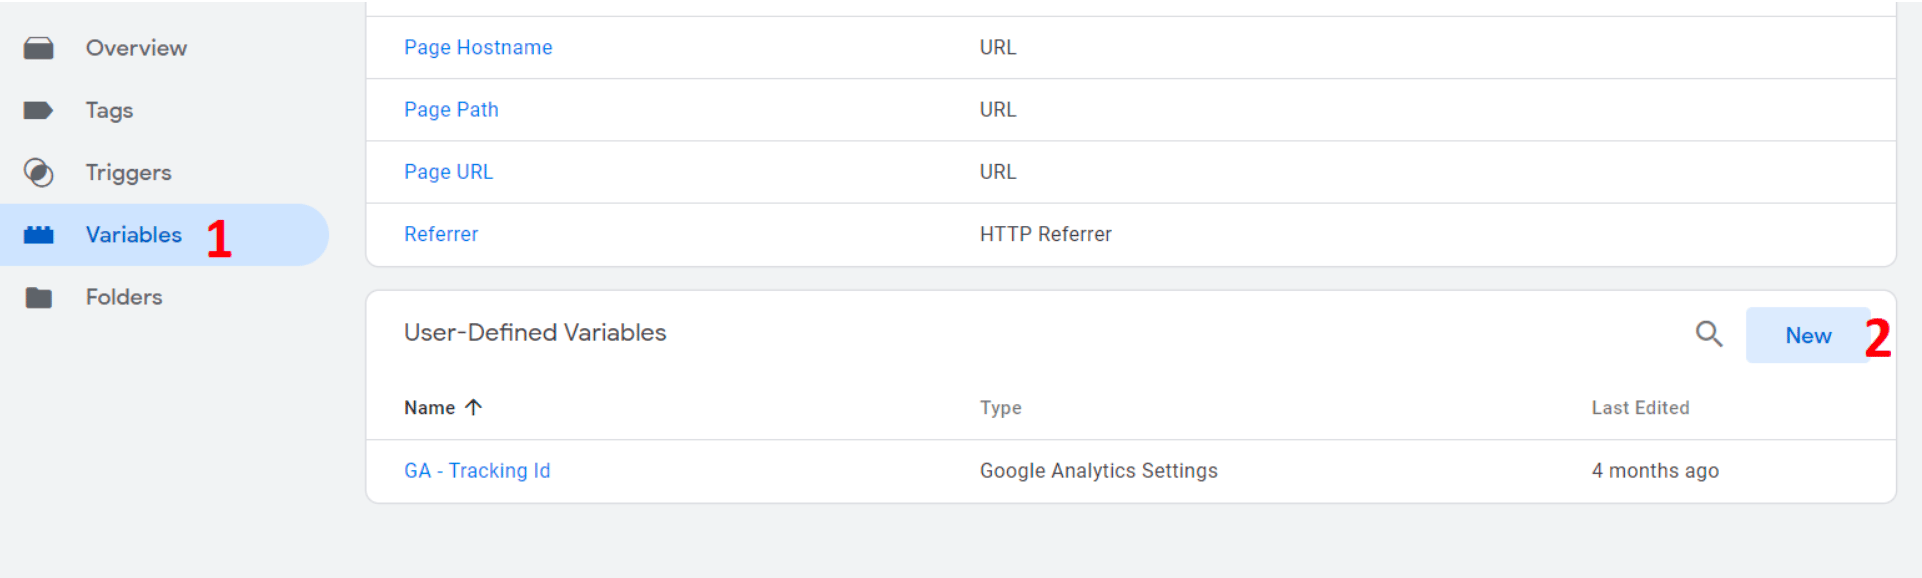
Below the Triggers menu, select Variables.
Under User-Defined Variables, select New.
Select Variable Configuration. Then select Data Layer Variable as the variable type.
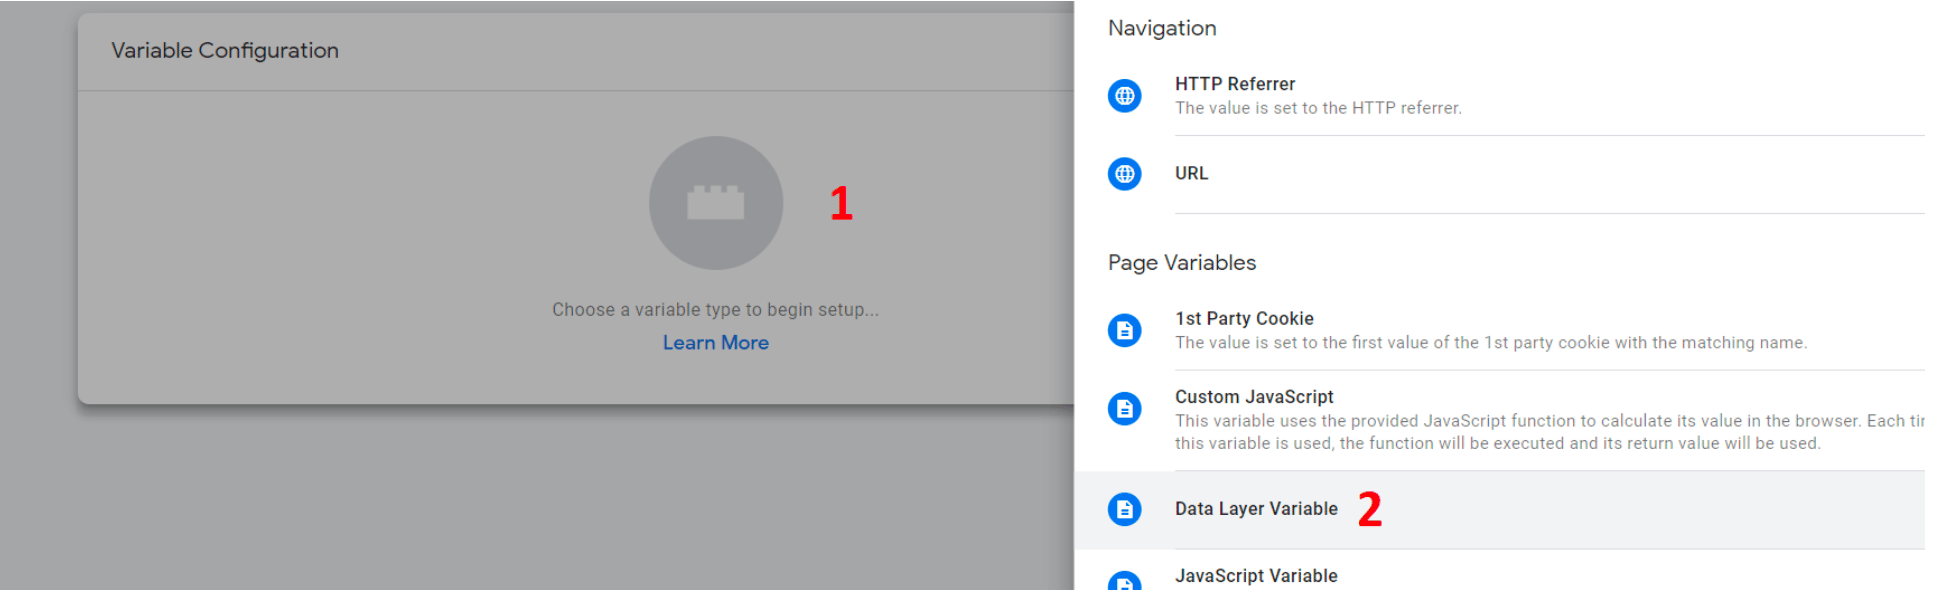
In the Data Layer Variable Name field, enter the key exactly as it was written in the code (e.g.
customerId, not customer Id.).Because the data layer in this example is a well-structured nested data layer and has child keys, use the key name of the parent and child elements for the Name. Separate the key names with a dot and give your variable a name as a reference to the key you are using.
In the Set Default Value hit the space bar, select Save.
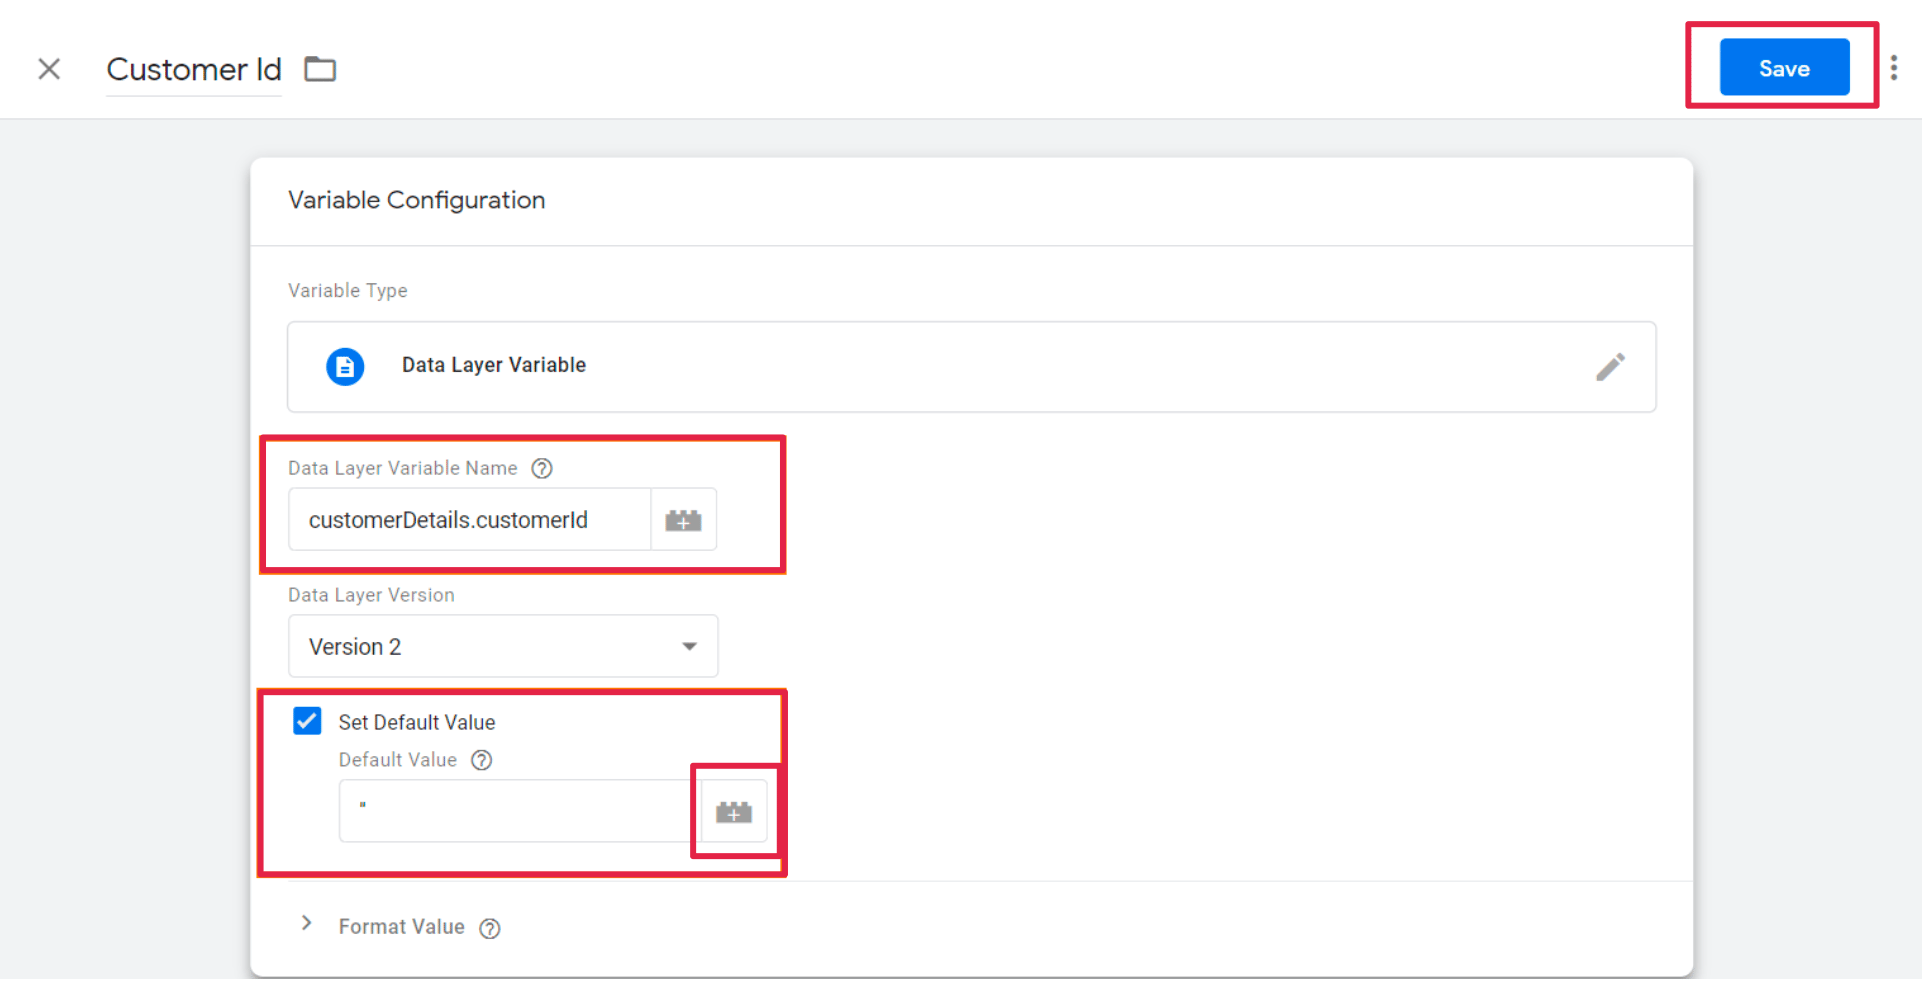
Because the customer is not always signed in, GTM would append the value
undefinedin cases where thecustomerIdkey is not populated. To counter this we've instructed you to set the default value in the Set Default Value field to a single blank space, this will pass a blank value instead ofundefined.
In most cases you should leave the Data Version set to the default value of Version 2.
Save the variable.
Repeat these steps for every data layer key (i.e. customer email key) that you would like to have as a variable in Tag Manager.
Preview the container to save the changes. You will publish the container at a later stage.
impact.com Identify Function
Add the identify function to the GTM container.
Now that you have a data layer placed on certain pages or a website and variables configured, the next tag you will be adding to your container is the impact.com identify function. This small but powerful script needs to be implemented on all the pages of your website and should be invoked after the UTT has been loaded.
The customer id and customer email variables will be used in this scenario once more, as placeholders in the relevant sections of the identify function.
Add the identify tag
Follow the same steps you did under the Steps to implement section from step 1, in order to:
Add a custom HTML tag to your container. Instead of using the Universal Tracking Tag, you will add the impact.com Identify script.
Remove the default value of the customer id key and replace it with the Customer Id variable you created in Set up data layer variables section above. Enclose the variable name in double curly braces.
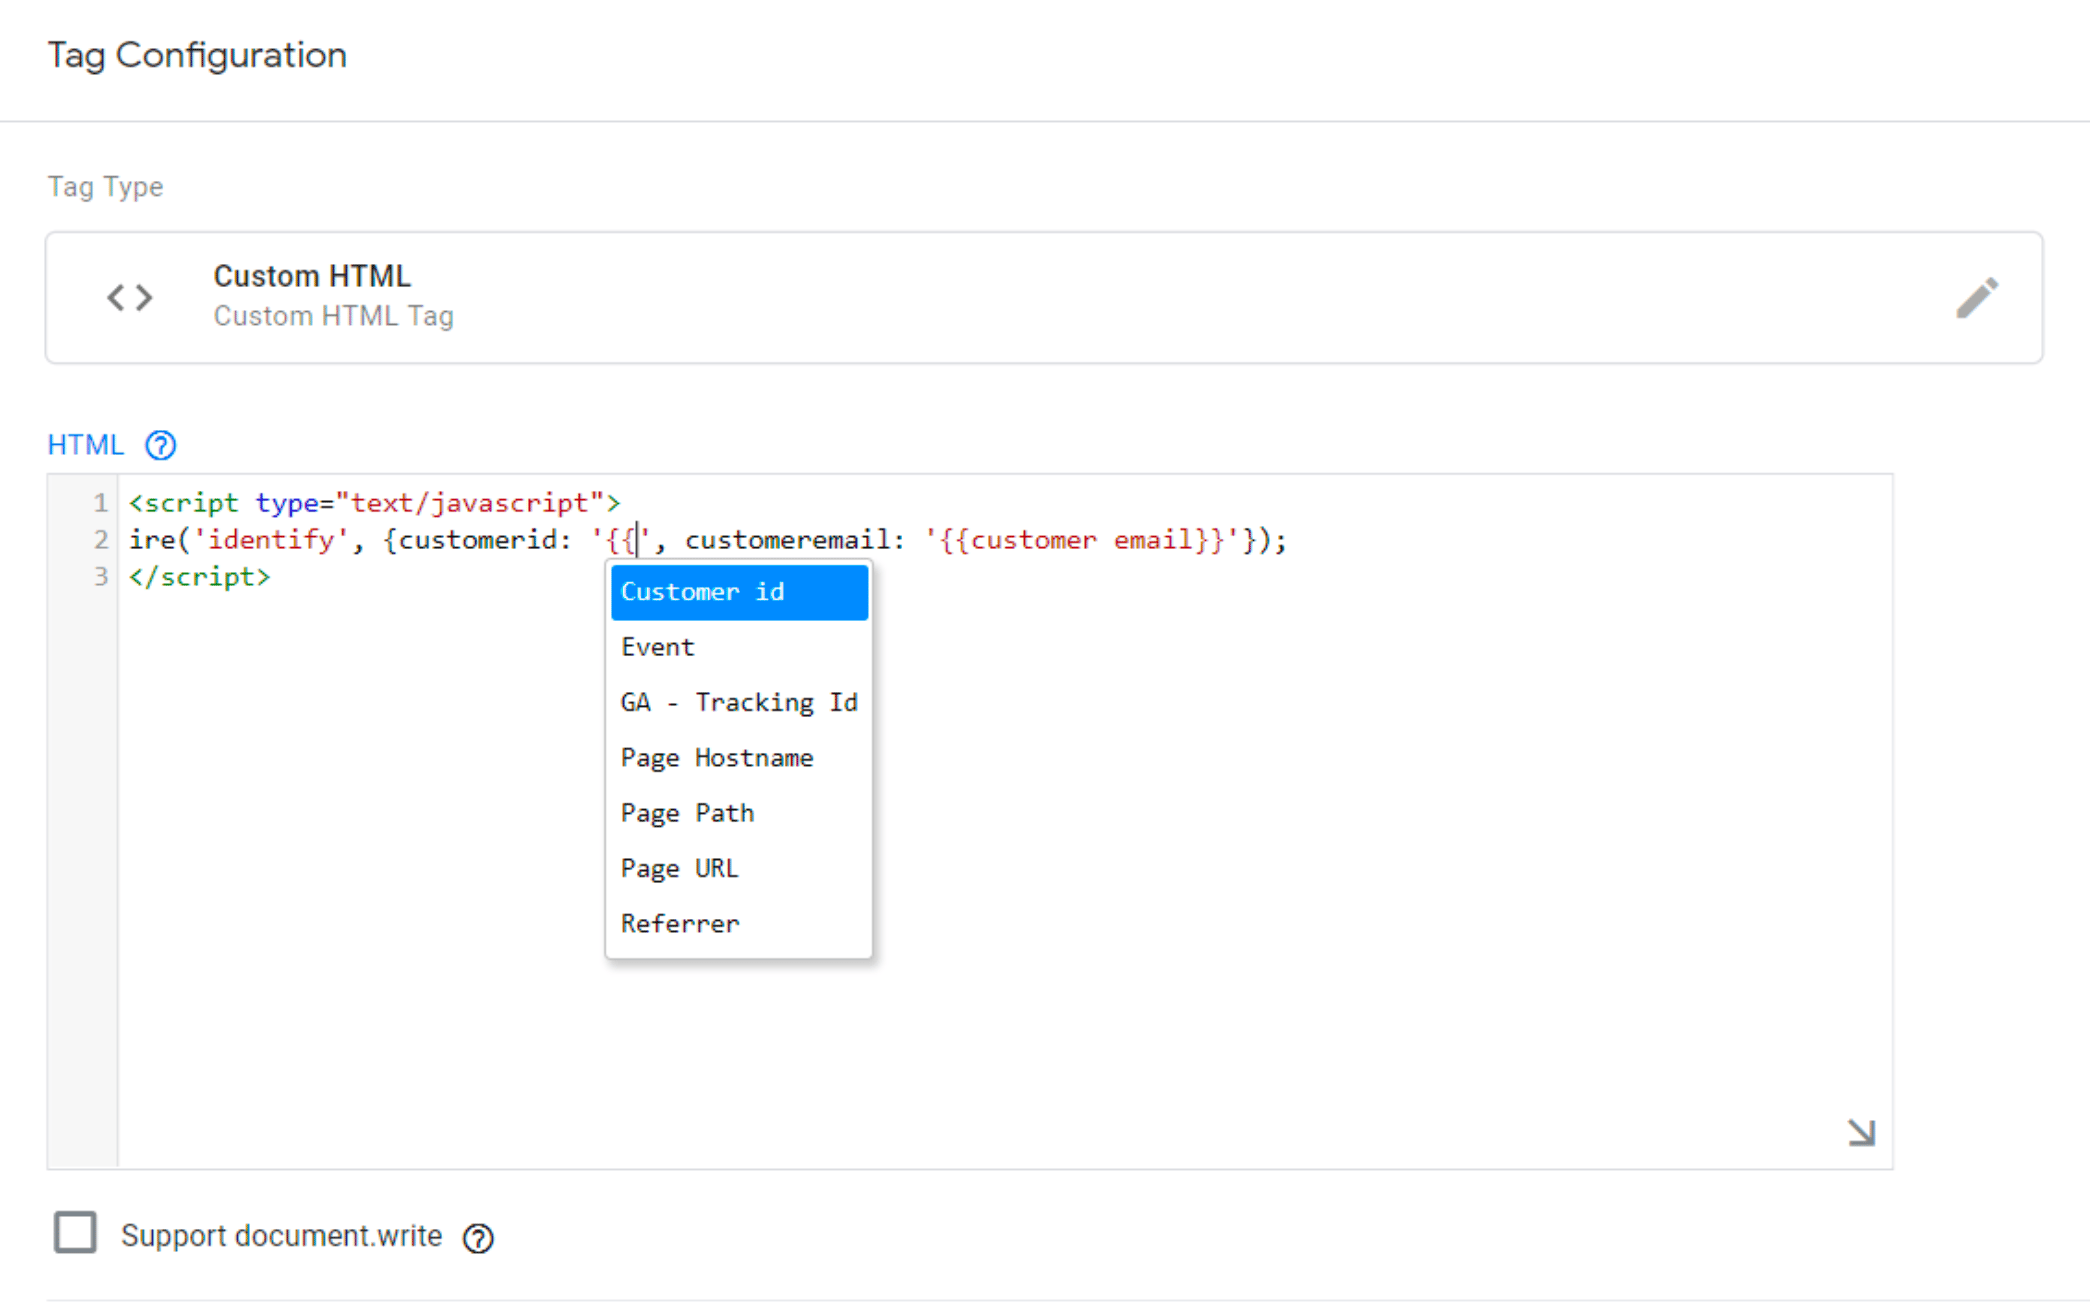
You will notice that when you start typing the first curly brace, GTM will display an autocomplete list of variables you defined under the data layer variable section.
Populate the customer email value with the customer email variable you configured earlier in your data layer.
At the end of the identify function, before the closing
</script>tag, add the following linedataLayer.push({'event':IdentifyInvoked});.
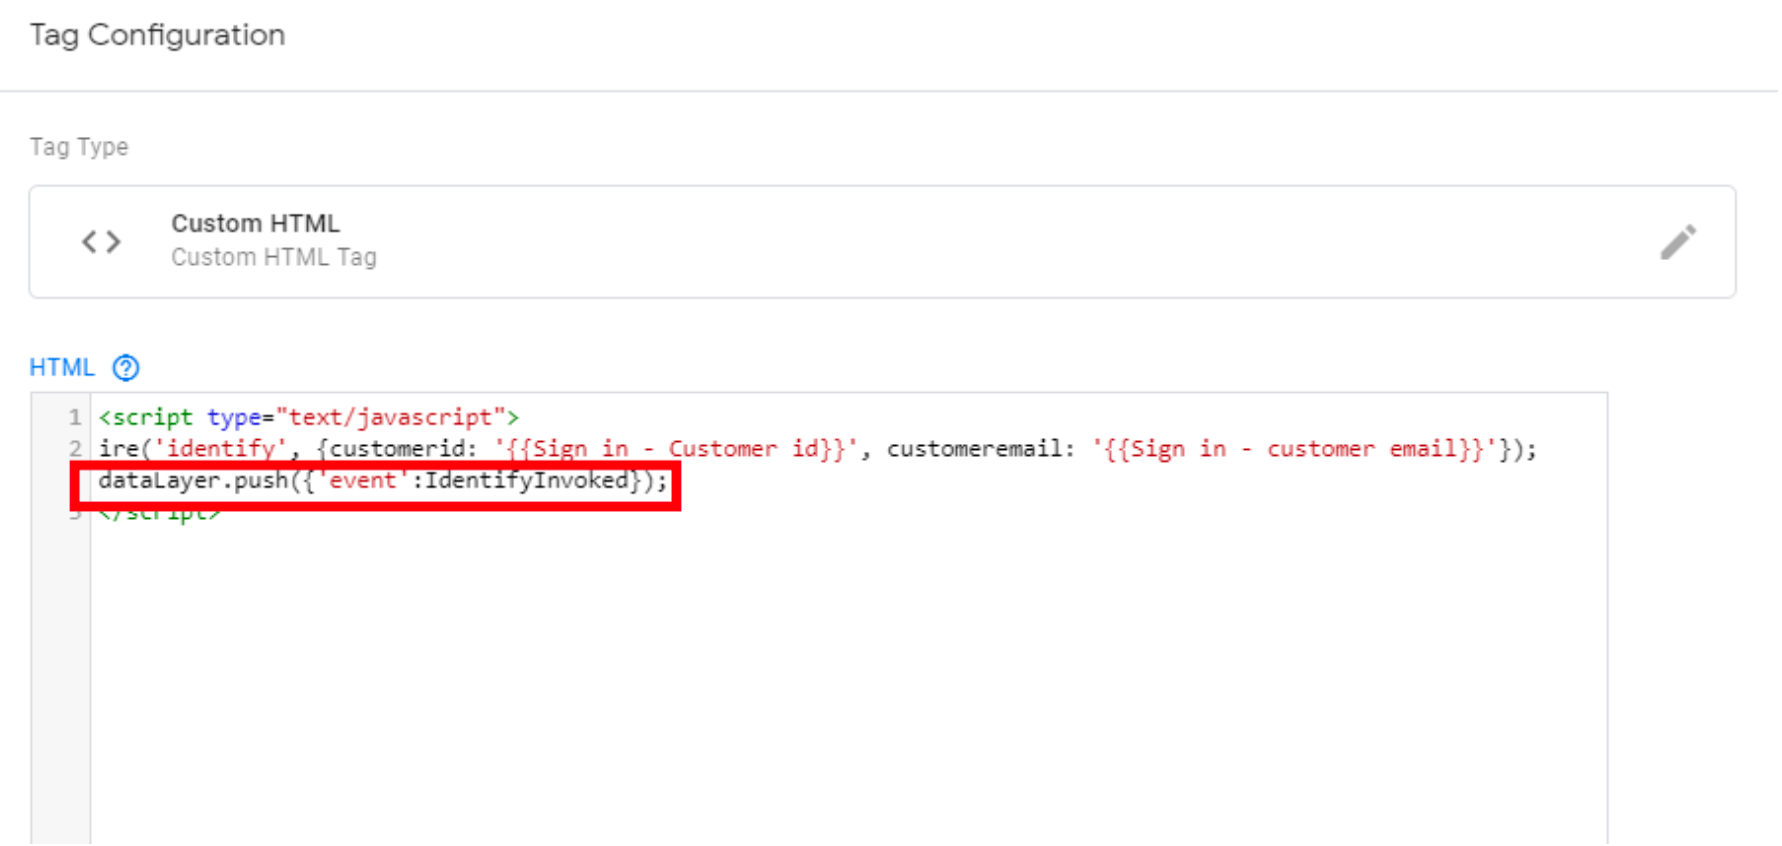
Following your technical integration guide from impact.com, the Identify function needs to be placed on all pages and should be invoked after the Universal Tracking Tag. This means you only need to create one trigger for the Identify function, to fire directly after the UTT event has fired. The UTT is already triggered to fire on all pages.
Select the + [Plus] above the All Pages trigger to add a new trigger. You will be creating a custom event trigger to tell GTM to fire the Identify function after the UTT event you've added in step 5 under the Steps to implement section (i.e. the
UttLoadedevent).Select the + [Plus] at the top right corner of the Choose a trigger page.
Give your trigger a name, then select Trigger Configuration → Custom Event.
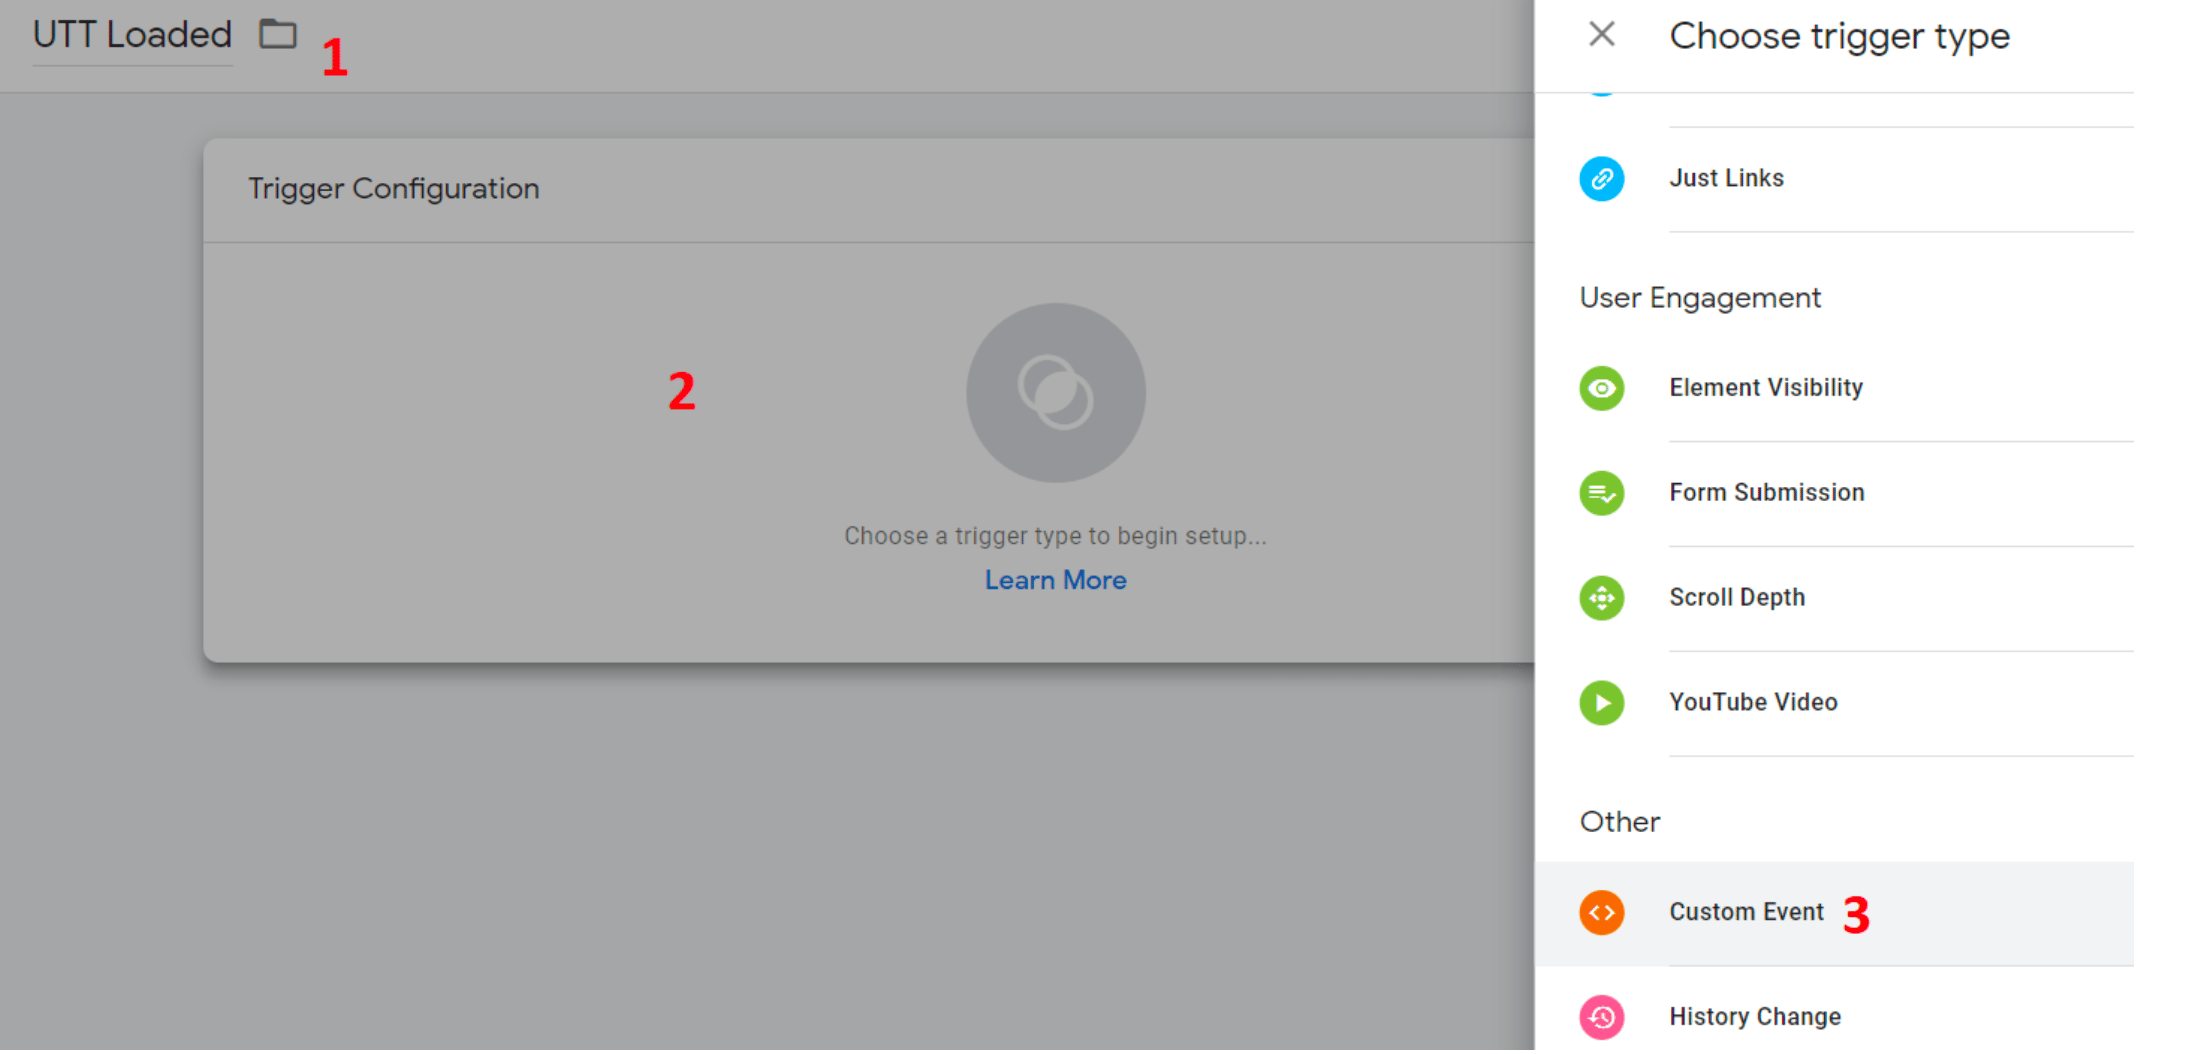
The custom event is added as a trigger. Select Some Custom Events. Set the first condition to Event, the second to equals, and the third to UttLoaded.
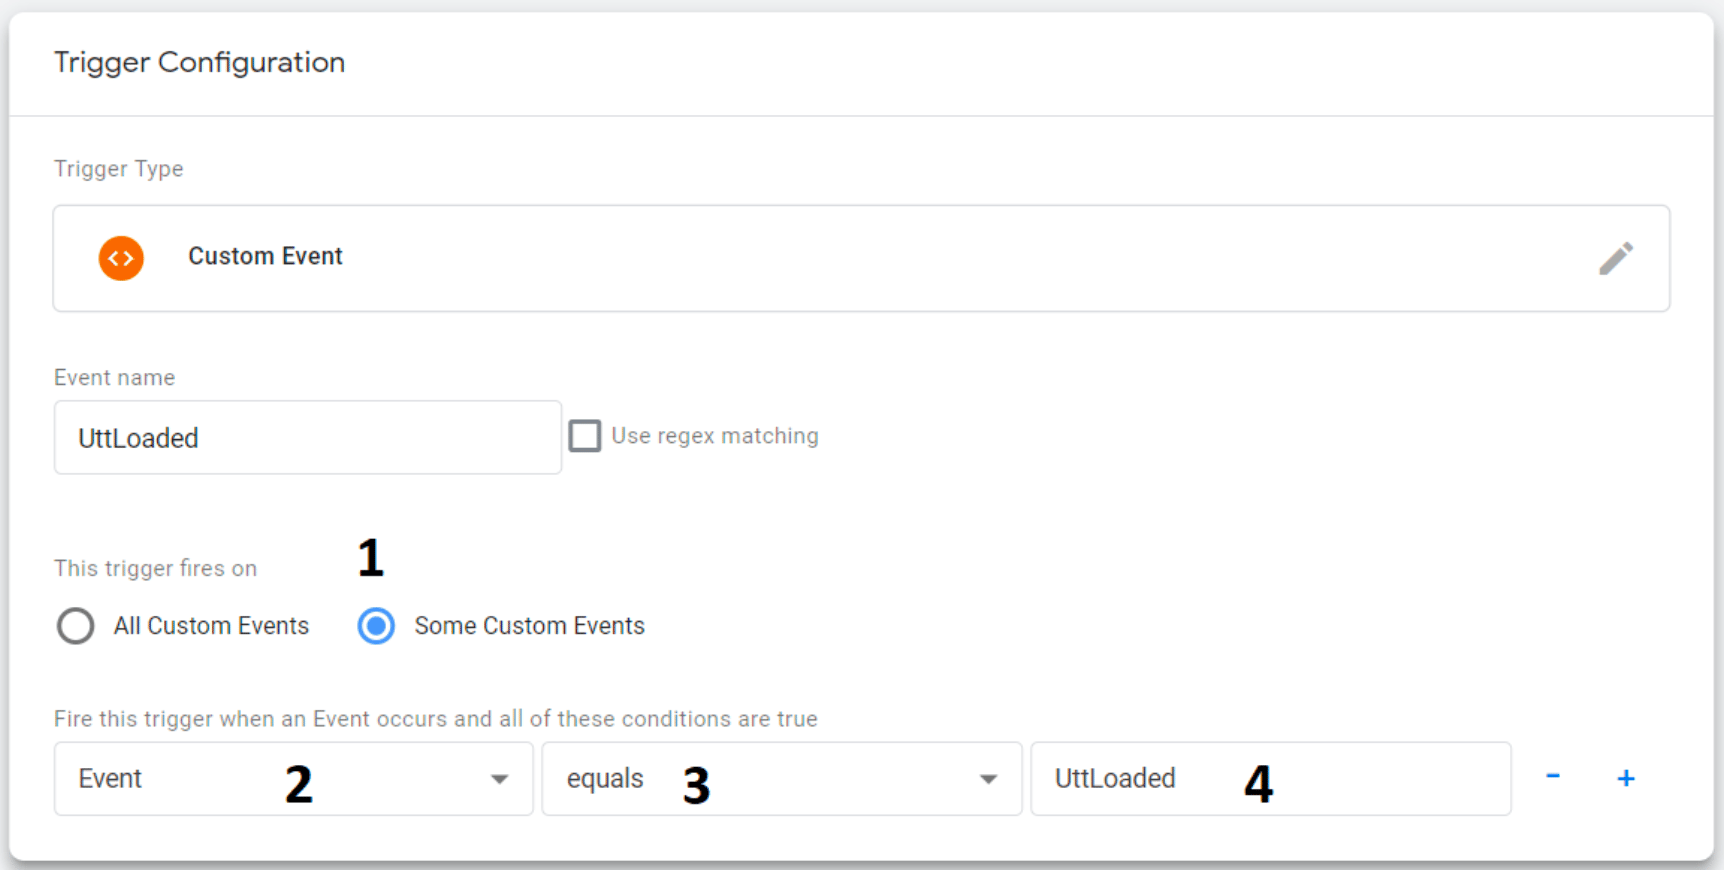
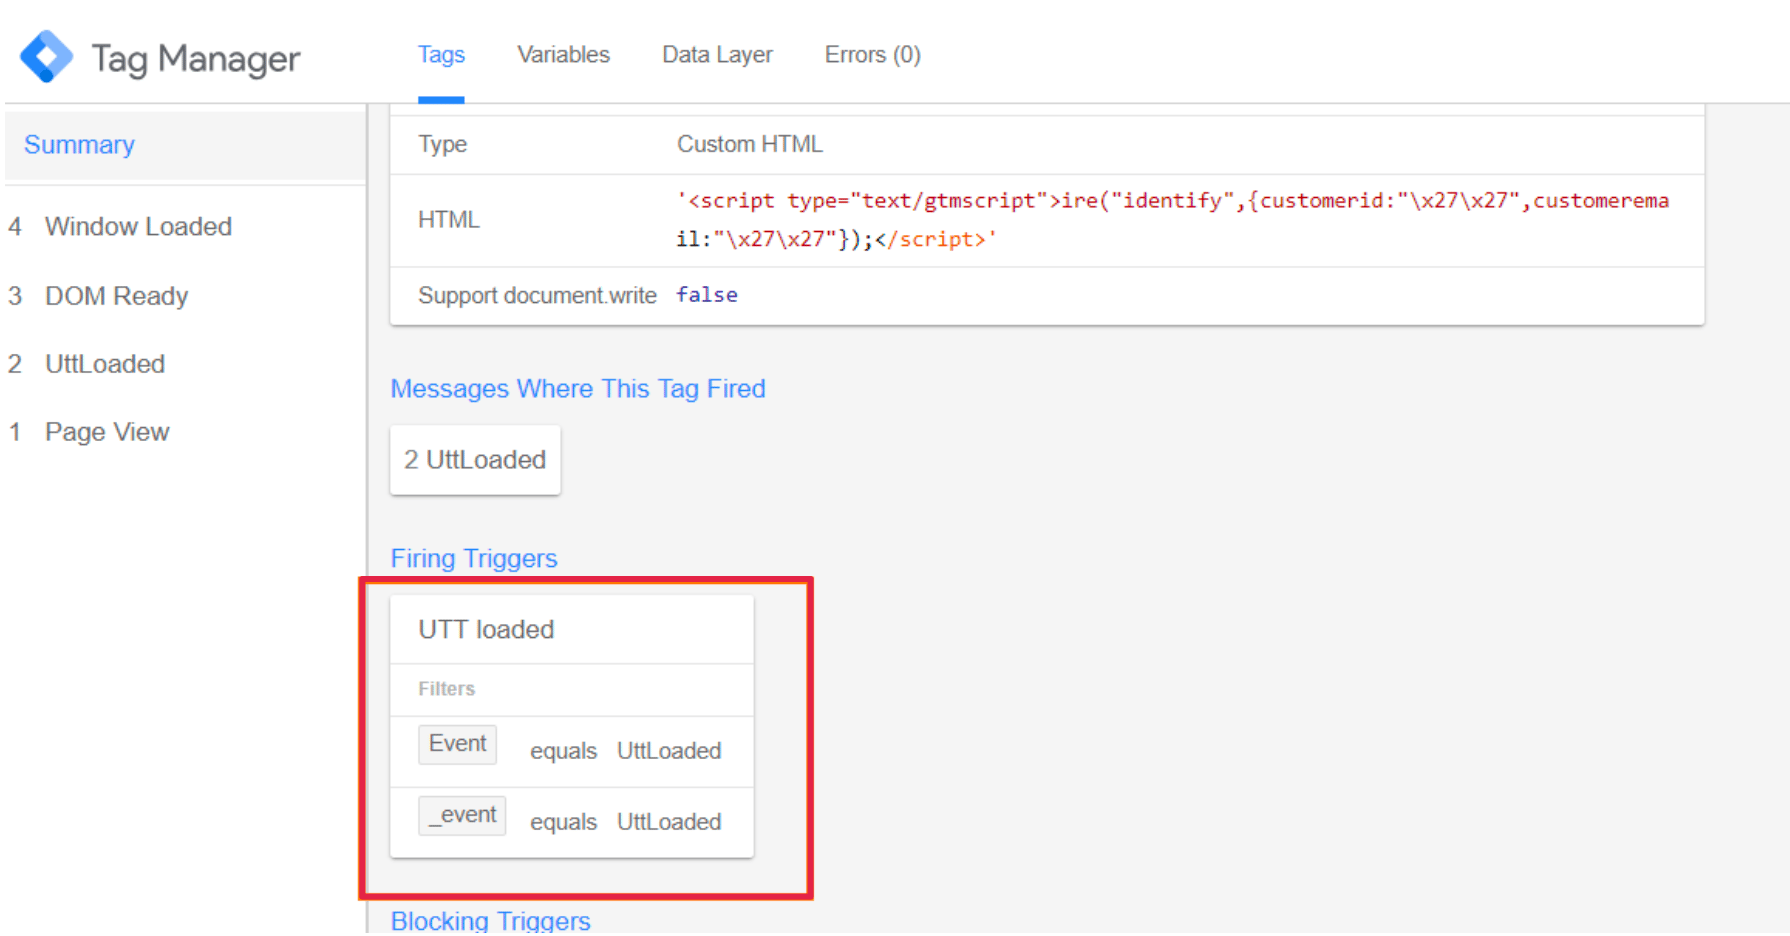
Select Save, then Save again, and select Preview. Visit your site and have a look at the GTM Debug Console.
Select the impact.com identify function. Below the tag is a Firing triggers section. It displays the event(s) that invoked the trigger to fire, namely UTT loaded. Remember the Impact UTT is already set to fire on all pages.
Time for another test. Sign in or register as a customer and navigate to your customer confirmation page, where you placed the data layer.
Test to see if the customer id and customer email variables you added in steps 2 and 3 above have populated correctly.
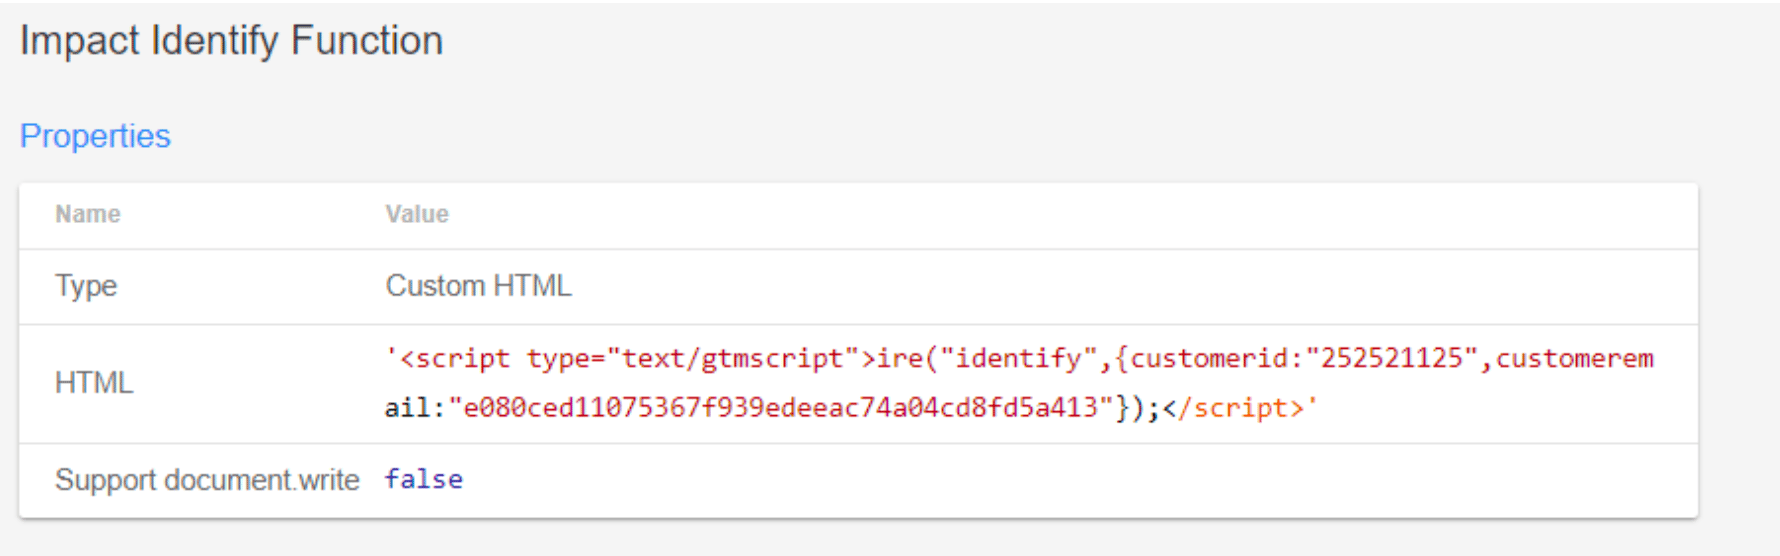
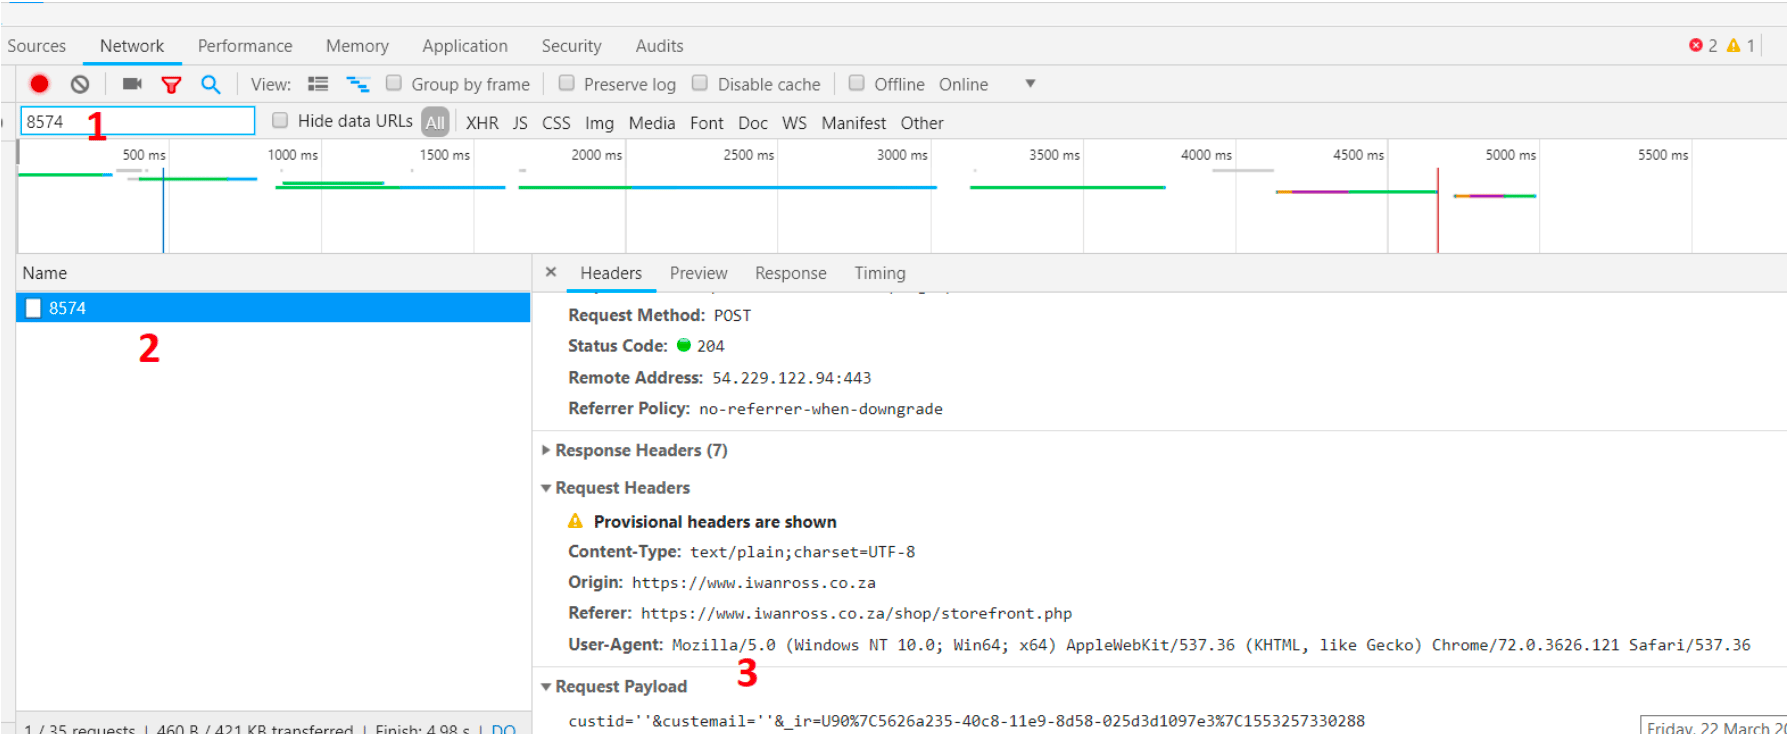
Test to see if the customer email key will pass blank values if it is not populated too. Open your browser developer tools and sign out, then navigate to the Network tab of the developer tools console. Provide your campaign id in the filter box. Then test to see if the customer id and customer email values were passed with the identify function in the headers.
As shown in the above screenshot, the customer id and customer emails are passing back blank values and the identify function has been invoked, directly after the UTT has fired.
The page view trigger
Set up the page view trigger.
Previously, custom events and all page views were used as triggers to determine when to fire the different tags as well as in which order. This time, only the impact.com conversion tracking tag needs to fire on your order confirmation page (this function will only work after the UTT has completely executed on this page), after a successful online purchase or subscription event.
To do so, please follow the instructions listed below:
Create a new tag in your GTM container.
Name your tag accordingly and select Custom HTML as the tag type.
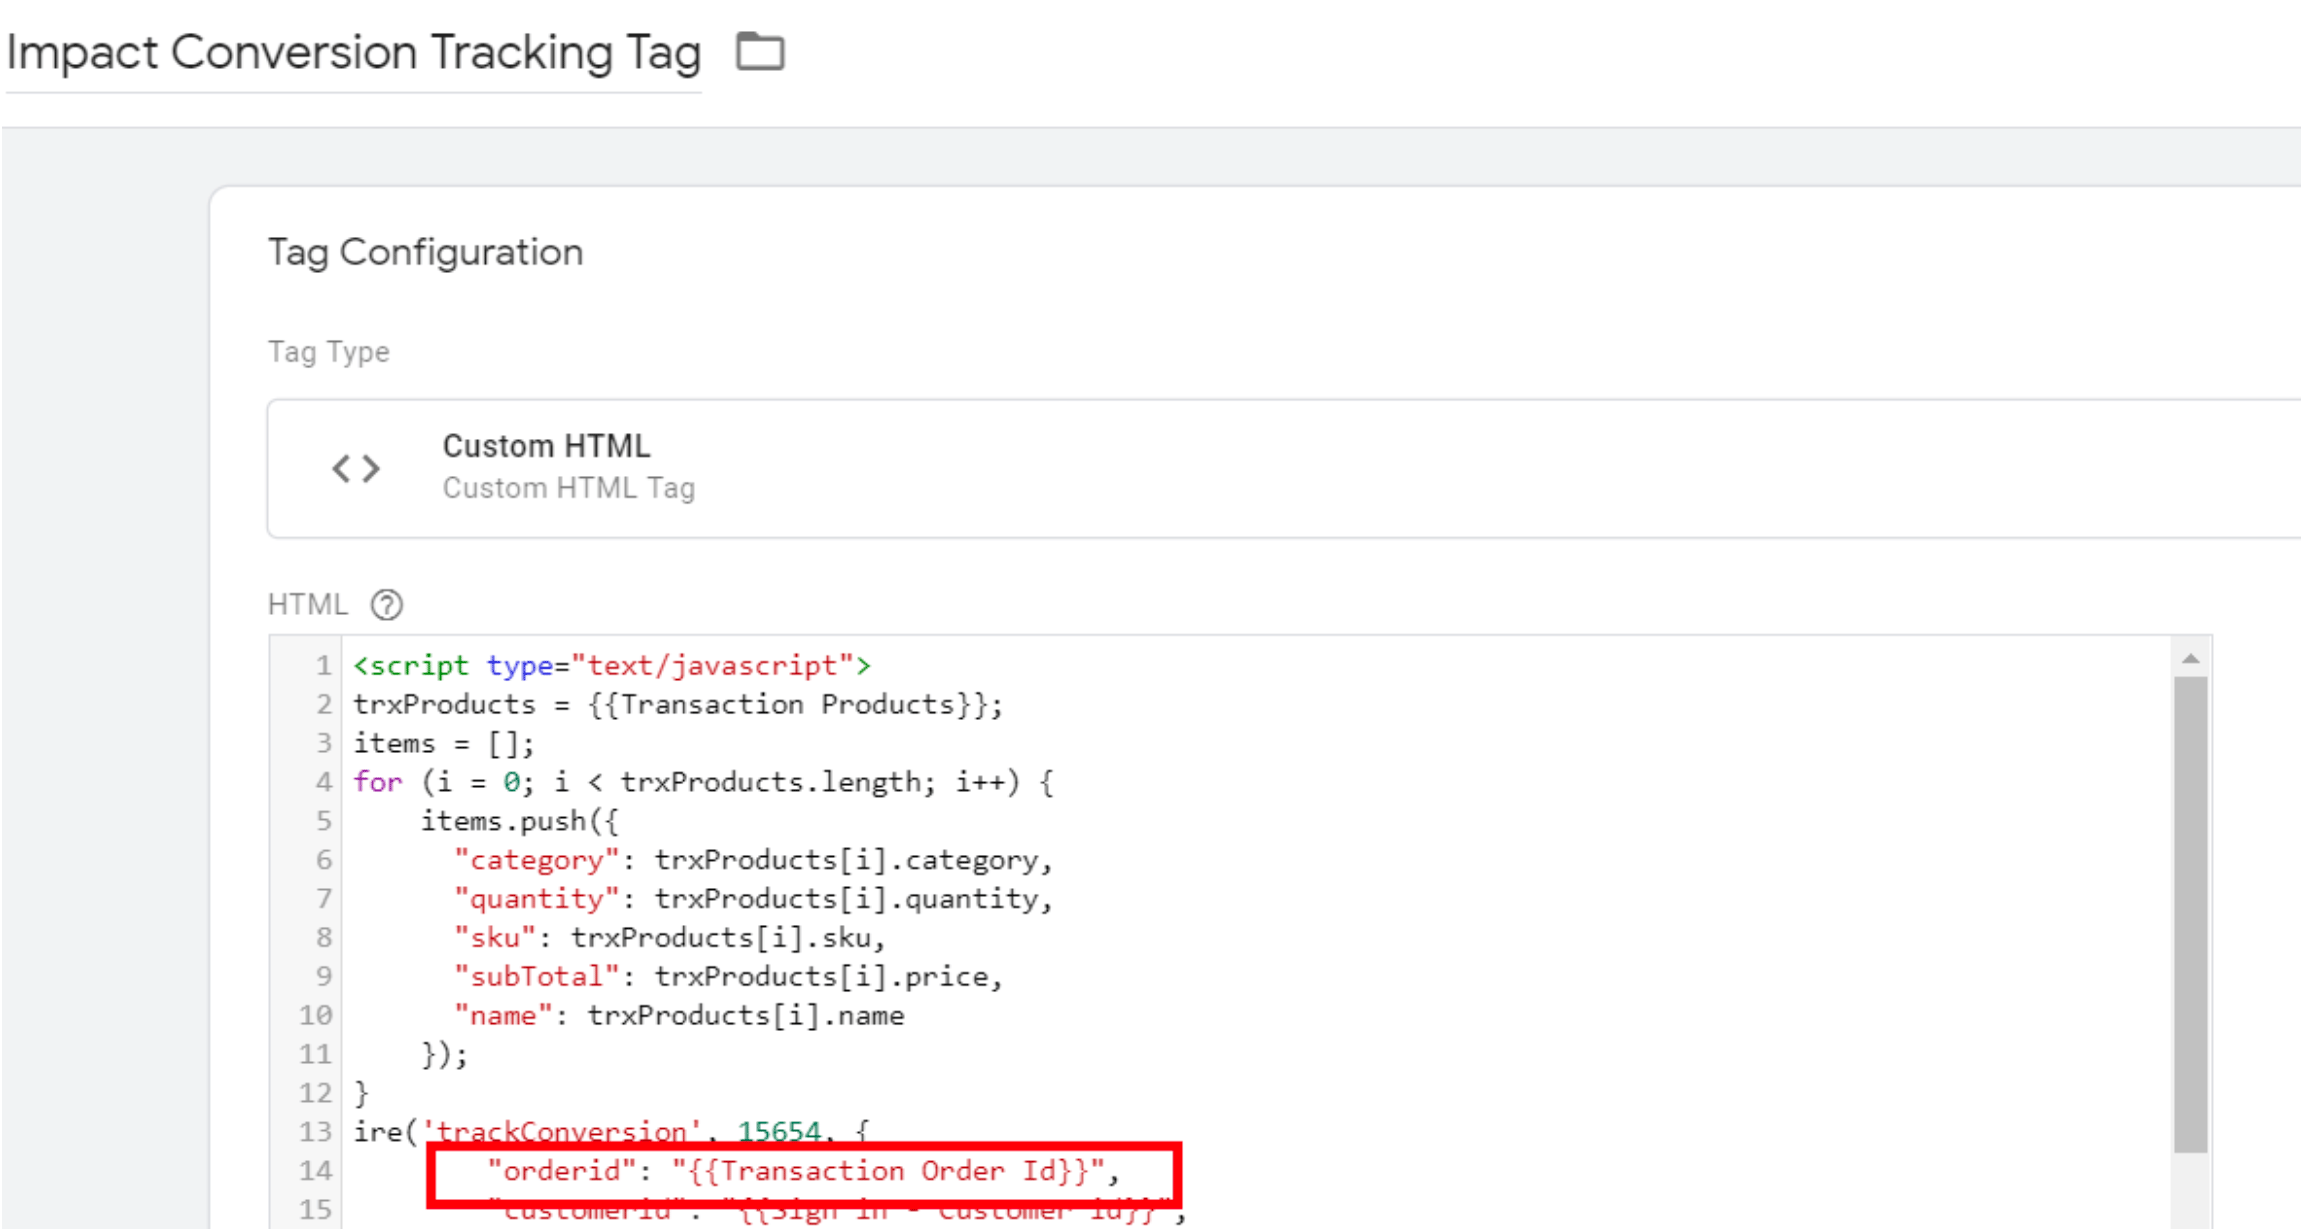
Input your impact.com conversion tracking script into the HTML field.
Modify the different fields to match the data layer variables you have configured.
Navigate to the Trigger section.
Select the + [Plus] in the top right corner to create a new trigger.

Name the trigger (e.g. Order Confirmation Page).
Navigate to the Trigger Configuration section.
Select Page View as the trigger type.
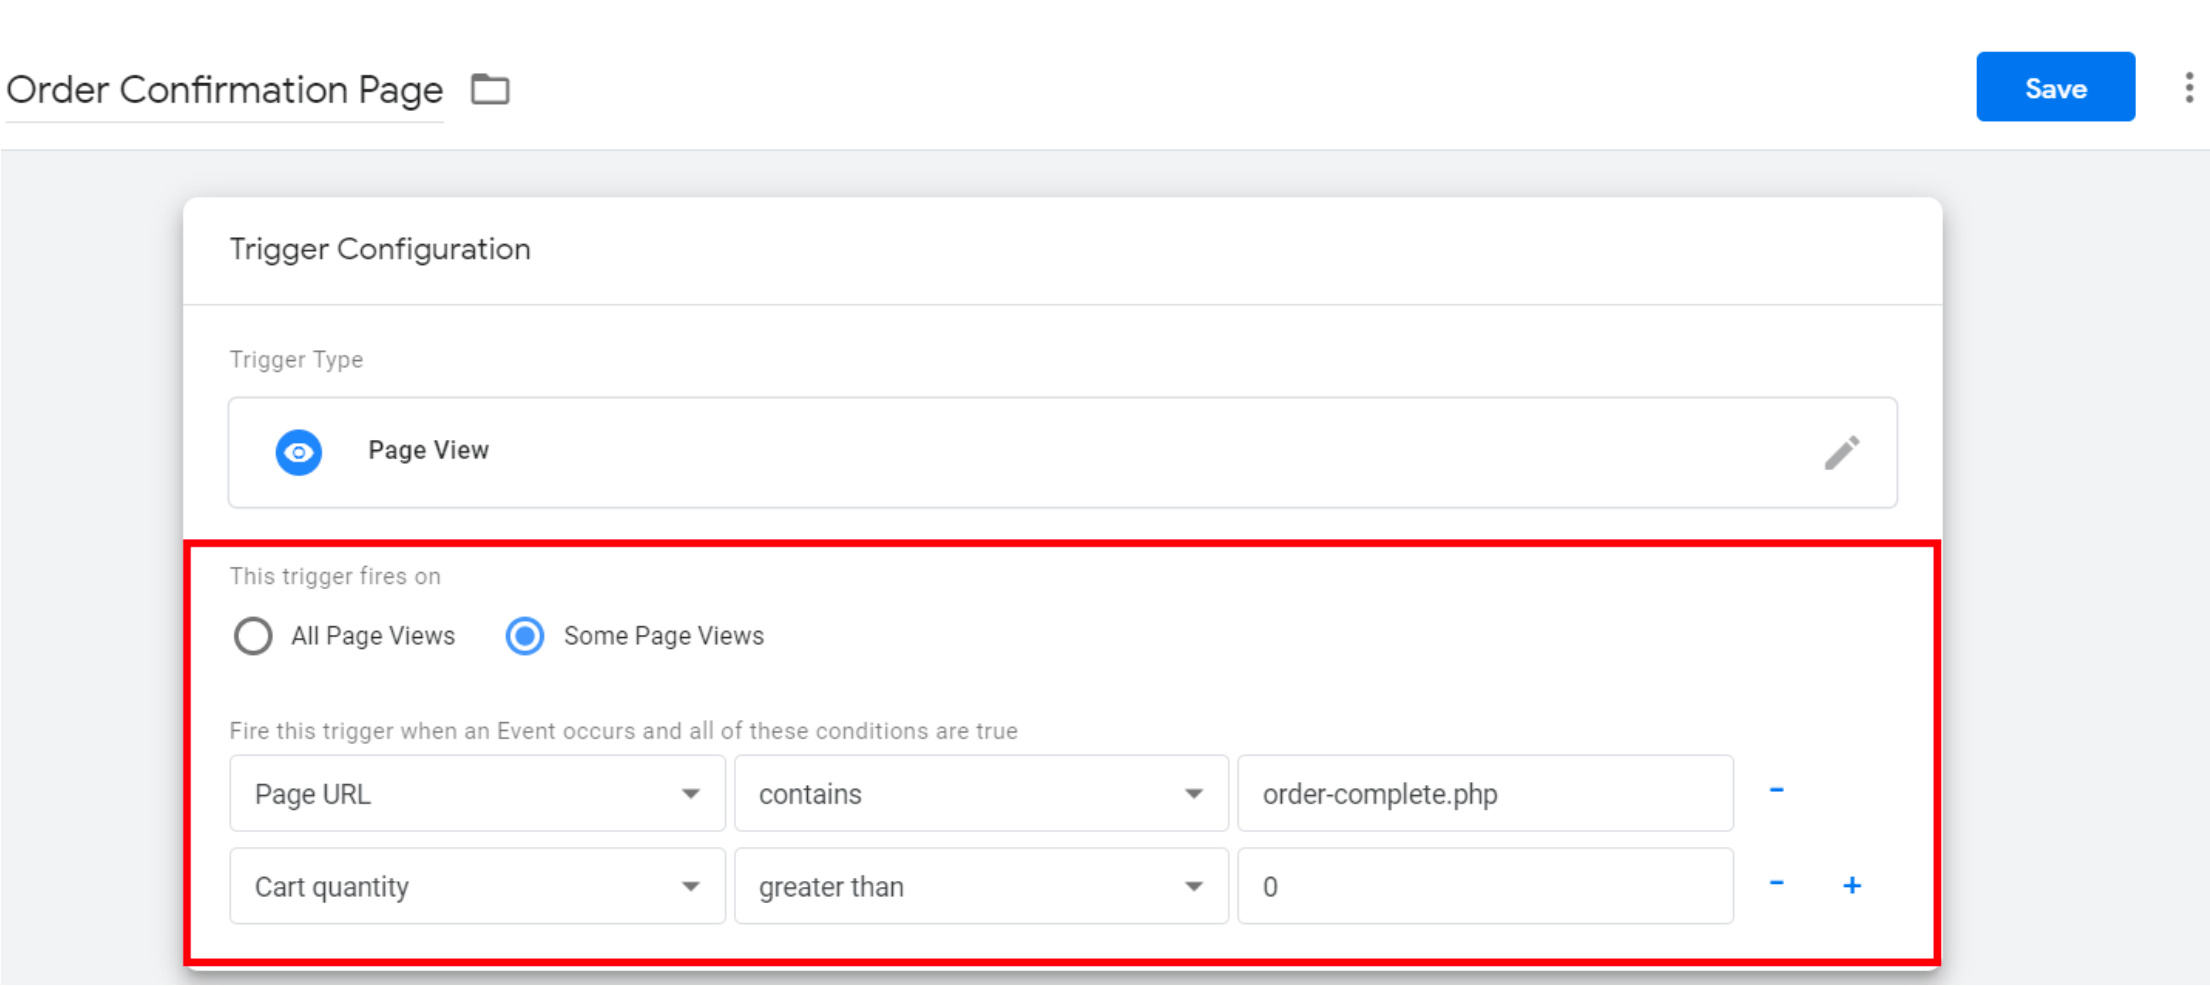
Navigate to the Trigger Fires On section, select Some Page Views.
Specify the page view conditions, then select Save. There are many conditions to select from and implementation is unique. You can select the + [Plus] to the right to add additional conditions.
It is also possible to use the data layer variables as conditions. Select a condition that clearly distinguishes your order confirmation page from your other pages.
Select Save.
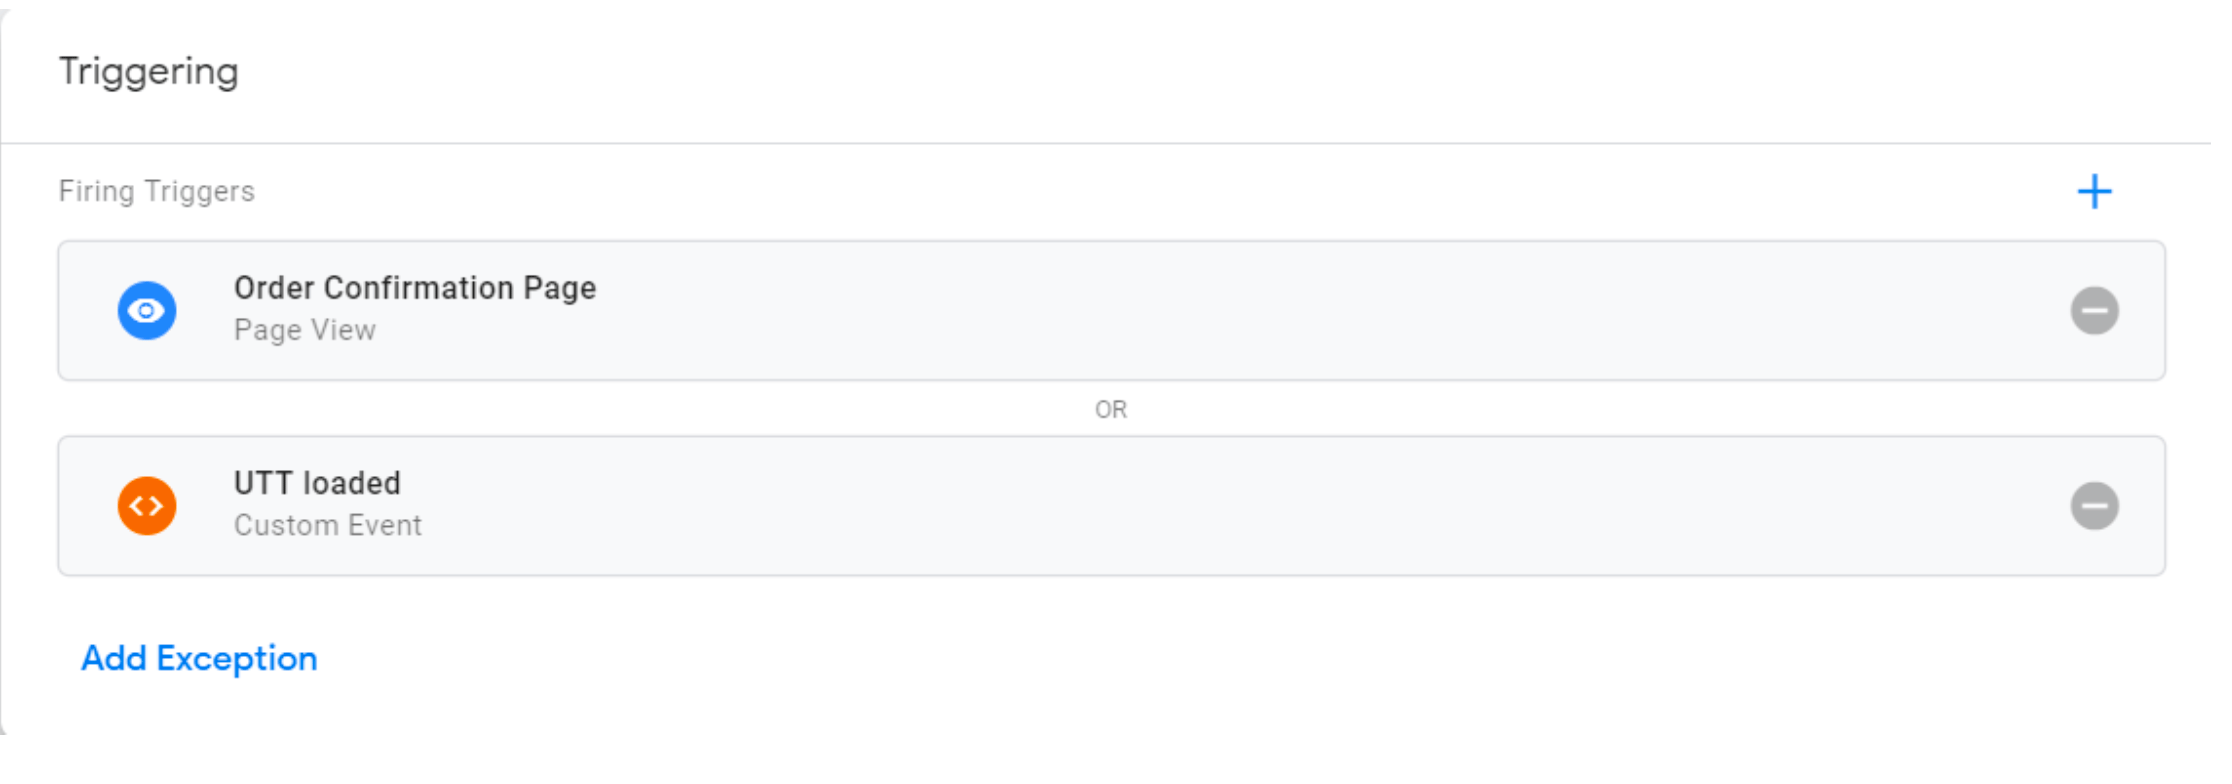
It is considered good practice to add an additional trigger to only fire the conversion tracking tag after the universal tracking tag has been loaded (i.e. the custom UTT loaded event trigger).
Implementation
The final step in the impact.com tag placement journey is to publish the GTM container. Doing this will publish your tags to your production or staging environment, wherever you have placed the GTM tags. If you are deploying to your production environment, you will have to move the GTM tags to your production site pages.
You have options to configure different environments from within GTM, for example, if you wanted different environments to test like "Staging" and a production environment, "Live".
Steps to implement
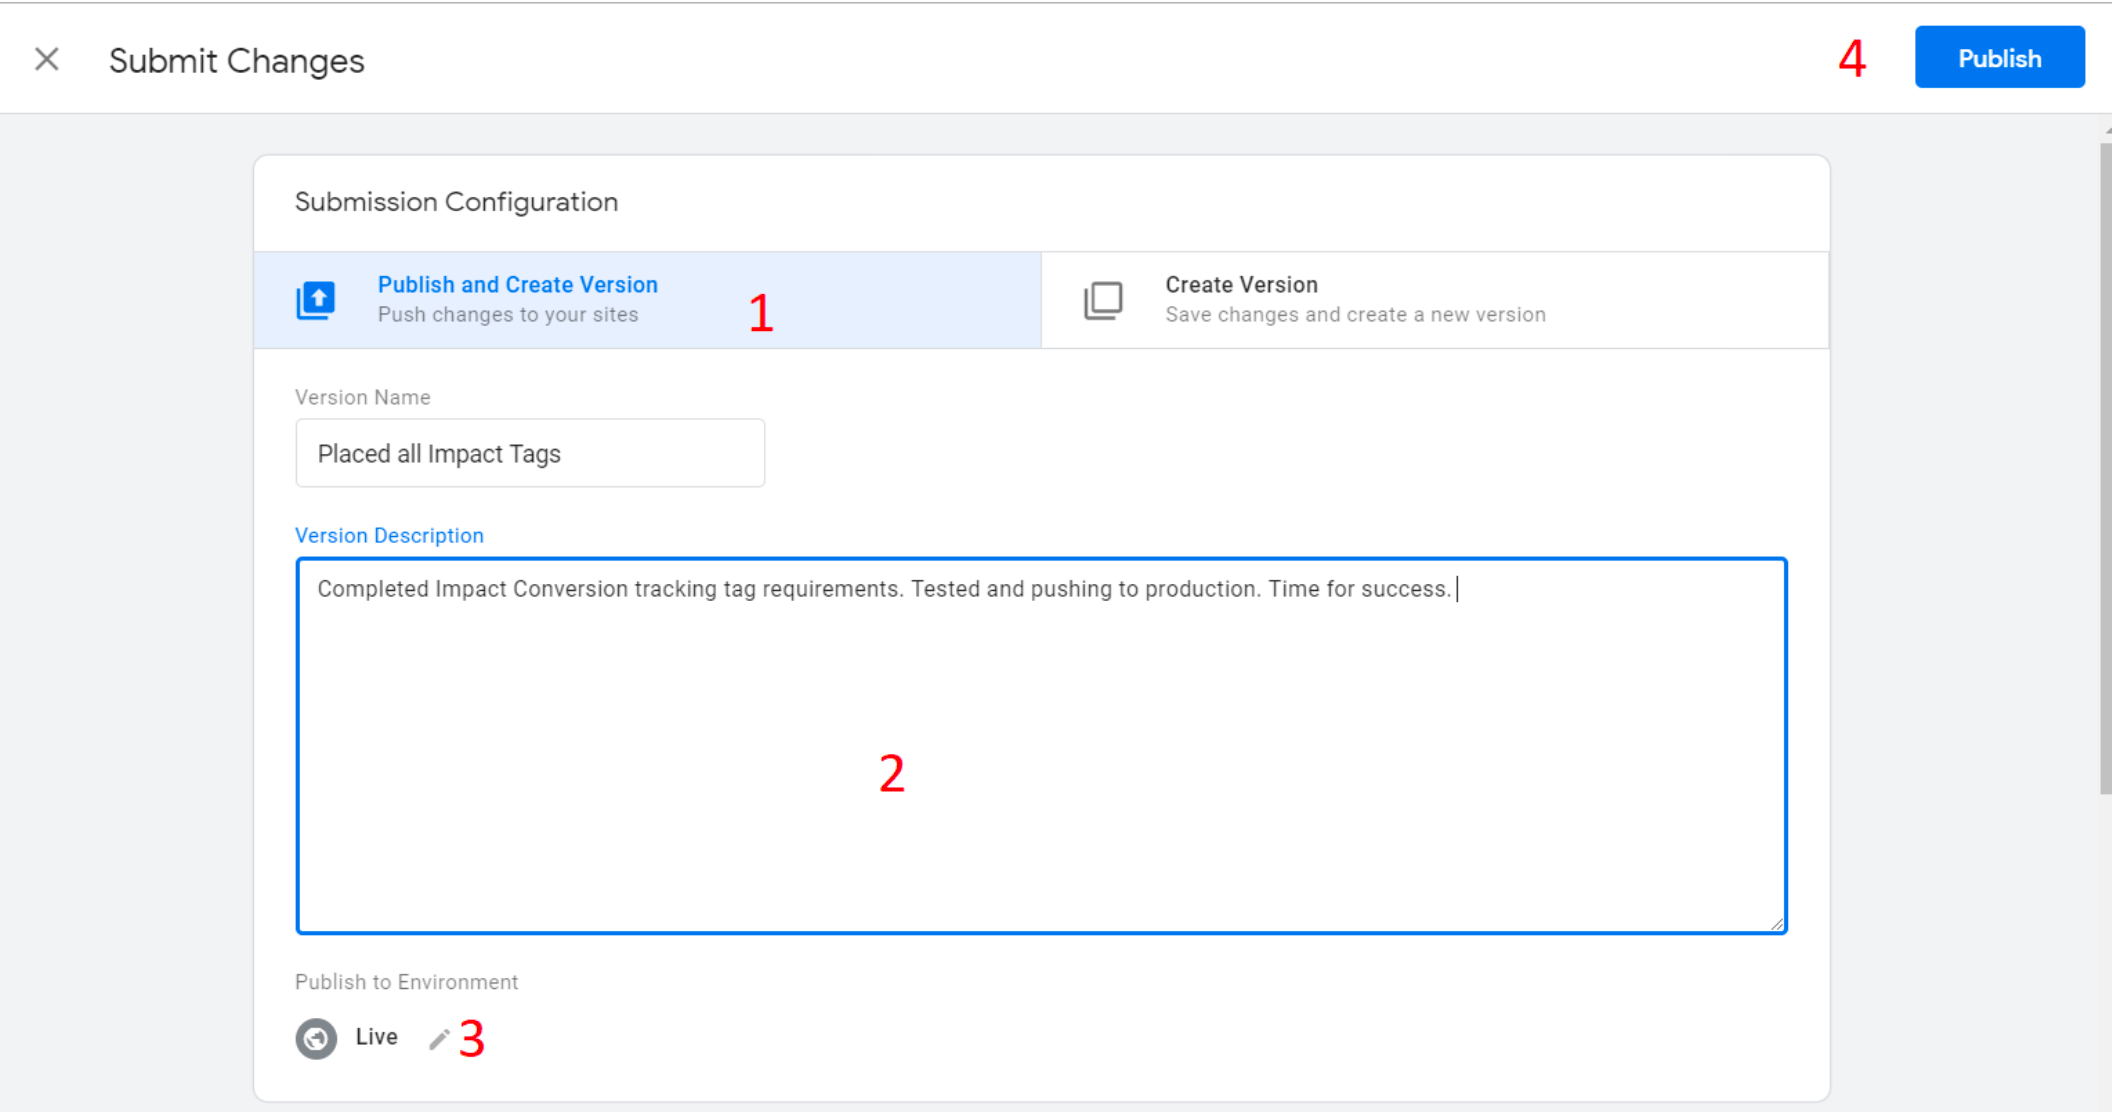
Follow the steps below to publish your GTM container.
Select Publish and Create Version at the top of your GTM container.
Optionally, give the version a name as well as a description for the workspace changes.
Optionally, select the environment. If you are moving from staging to live, this step is required.
Select Publish.
Once you have fully integrated the impact.com API, you can begin end-to-end testing to ensure everything is working properly. Learn how to proceed with End-to-End Testing.
Last updated