| Setting | Description |
|---|---|
| Impact Account SID * | In the impact.com platform, from the top navigation bar, select |
| Auth Token * | In the impact.com platform, from the top navigation bar, select |
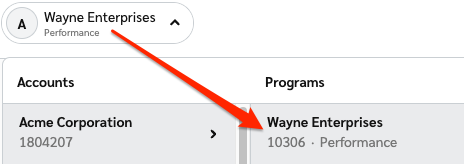
| Program ID * | Enter your Program ID value. To find this value, select your brand name in the top-left corner of the impact.com app. Your Program ID is the numerical value under the program name.
|
| Sales and Subscriptions Tracker * | In the impact.com platform, from the top navigation bar, select |
| Universal Tracking Tag * | From the top navigation bar, select |
| Field | Example | Description |
|---|---|---|
ActionTrackerId | 16027 | Also known as the Event Type ID, this is the ID number for your impact.com event type. |
CampaignId | 8882 | Also known as a Program ID, this is the ID number for your impact.com program/campaign. |
ClickId | 2uz3sQWFlxyJRcqwUx0Mo34VUkiyyO0tIzeG3U0 | The Click ID associated with the action. |
CurrencyCode | USD | The currency code for the currency recorded in the action. |
CustomerEmail | 38b85baa75385758d44d3dbfd97921c32e0d09a9 | If you're tracking and passing customer info, this is the SHA1 hash of the customer's email. |
CustomerEmailSHA256 | 987669e572d2cc2eba5f690b8f766ab58986779638d4c880e056aeb996b6ce76 | If you're tracking and passing customer info, this is the SHA256 hash of the customer's email. |
CustomerId | 3222174466122 | If you're tracking and passing customer info, this is an ID number referencing the customer associated with the order. |
CustomerStatus | EXISTING or NEW | If you're tracking and passing customer info, this is the status of the customer associated with the order. |
EventDate | 2020-06-18T14%3A33%3A49 | Tracks the date that the action occurred. |
IntegrationSource | Impact_BigCommerce_Plugin | Identifies the integration type. Always sends Impact_BigCommerce_Plugin. |
IpAddress | 1.1.1.1 | The IP address associated with the action. |
OrderId | 2516623458378 | The impact.com OID (Order ID) value associated with the action (Order ID column in BigCommerce orders page). |
OrderPromoCode | Welcome10 | Promo code used for the order. The code will be passed here unless it is set to be applied to a specific product. |
ItemSku{N} | KS944RUR | The SKU number of the BigCommerce product (called SKU on BigCommerce). |
ItemQuantity{N} | 1 | The quantity amount for the item in the action. |
ItemCategory{N} | Course | he category of the BigCommerce product (called Categories on BigCommerce). |
ItemName{N} | Course | The name of the BigCommerce product. |
ItemSubtotal{N} | 60.00 | The subtotal amount of the item before taxes, shipping, discount, and any other costs. |
ItemDiscount{N} | 10 | Discount applied for each item. Shows the proportionate value if the customer used OrderPromoCode. |
ItemPromoCode{N} | Spanish10Off | Item-level promo code. Passes the first non-null value. The code will be passed here if it is set to be applied to a specific product. This value is available for reporting only and cannot be used for contracting in impact.com. |