| Field | Description |
|---|---|
| Impact Account SID * | In the impact.com platform, from the top navigation bar, select |
| Auth Token * | In the impact.com platform, from the top navigation bar, select |
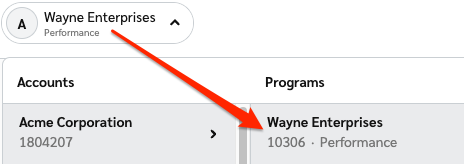
| Program ID * | In the impact.com platform, select your brand name in the top-left corner. Your Program ID is the numerical value under the program name.
|
| Event Type ID * | In the impact.com platform, from the top navigation bar, select |
| Recurring Tracker ID * | In the impact.com platform, navigate to your Event Types. Copy the number in parenthesis next to the name of the Recurring Subscription event type. |