Integrate with Chargebee
Chargebee is a subscription billing and revenue management platform. impact.com B2B brands are often running Performance programs to drive new subscription sign-ups and reward partners based on recurring payments from the sign-ups.
If you're using Chargebee, you can configure an integration to report subscription events and refunds directly to your program on impact.com.
How it works
- On your website (or store), you'll implement a script that captures an impact.com
im_refvalue from the user's landing page query string, then create a custom field in Chargebee account for the Click ID value. - You'll then generate a read-only Chargebee API key for impact.com to use.
- You'll provide the Chargebee API key for impact.com via our partner integration portal, which will generate URLs for the webhooks.
- Once authenticated, the integration uses Event Webhooks to capture subscription events and refund events from Chargebee and send them to your impact.com account.
Check before integrating
Before proceeding with the Chargebee integration, ensure you have:
- Access to your impact.com account
- Admin access to your Chargebee account
- Your impact.com account credentials ready
- A Performance program set up in impact.com
Configure a Chargebee custom field for the Click ID
Create animpact_click_id field and add it to the subscription as a custom field.
- Log in to your Chargebee account.
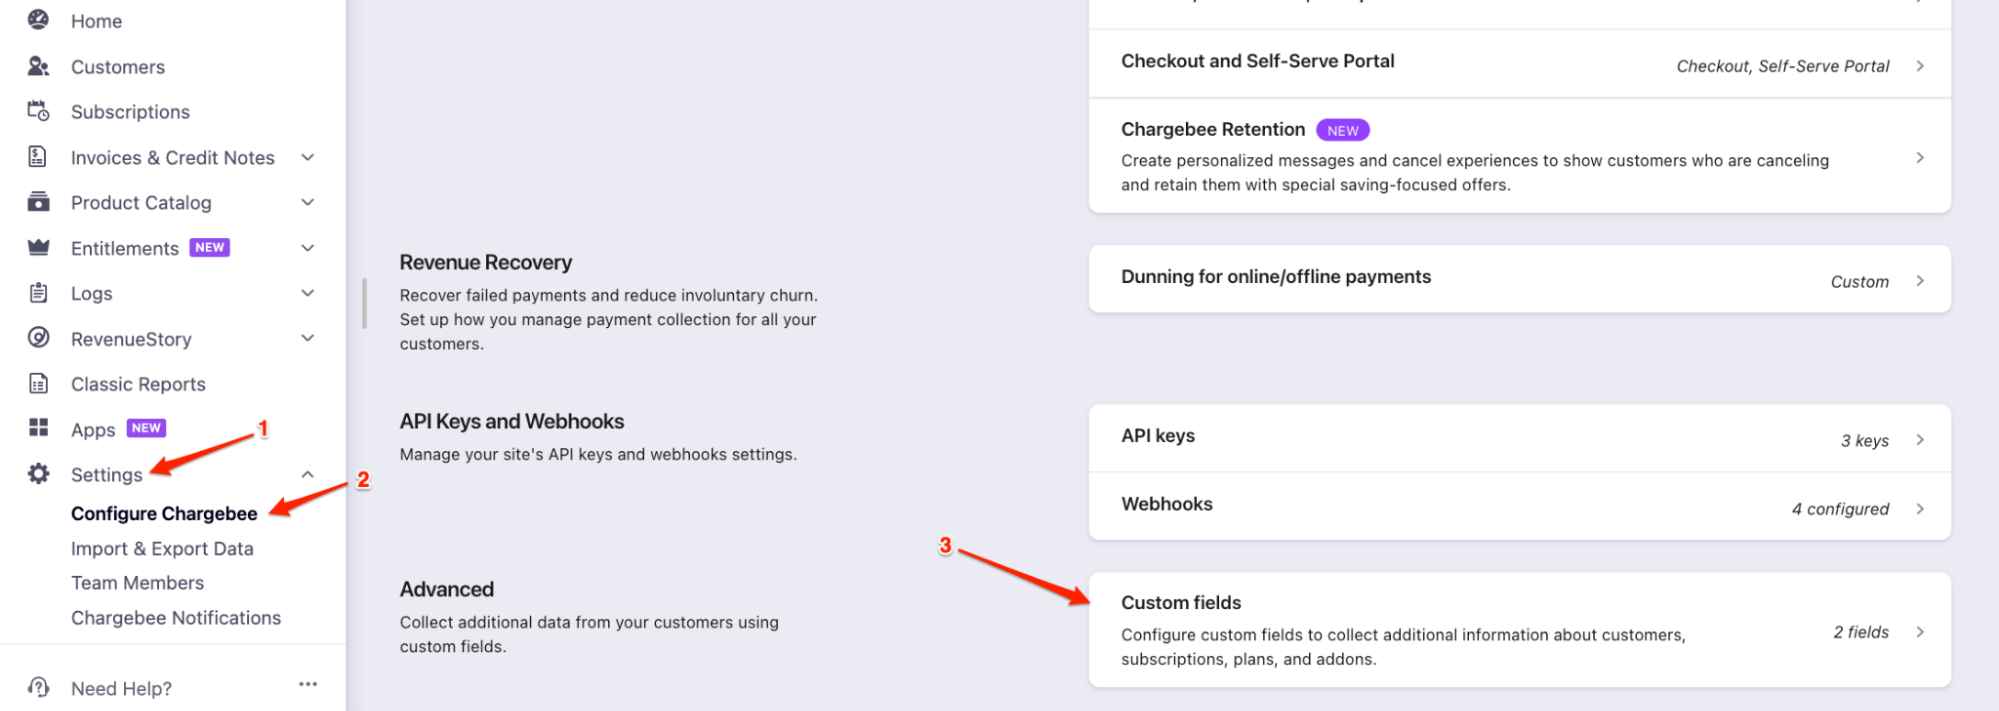
- In the left navigation menu, select Settings → Configure Chargebee.
In the Advanced section, select Custom fields.
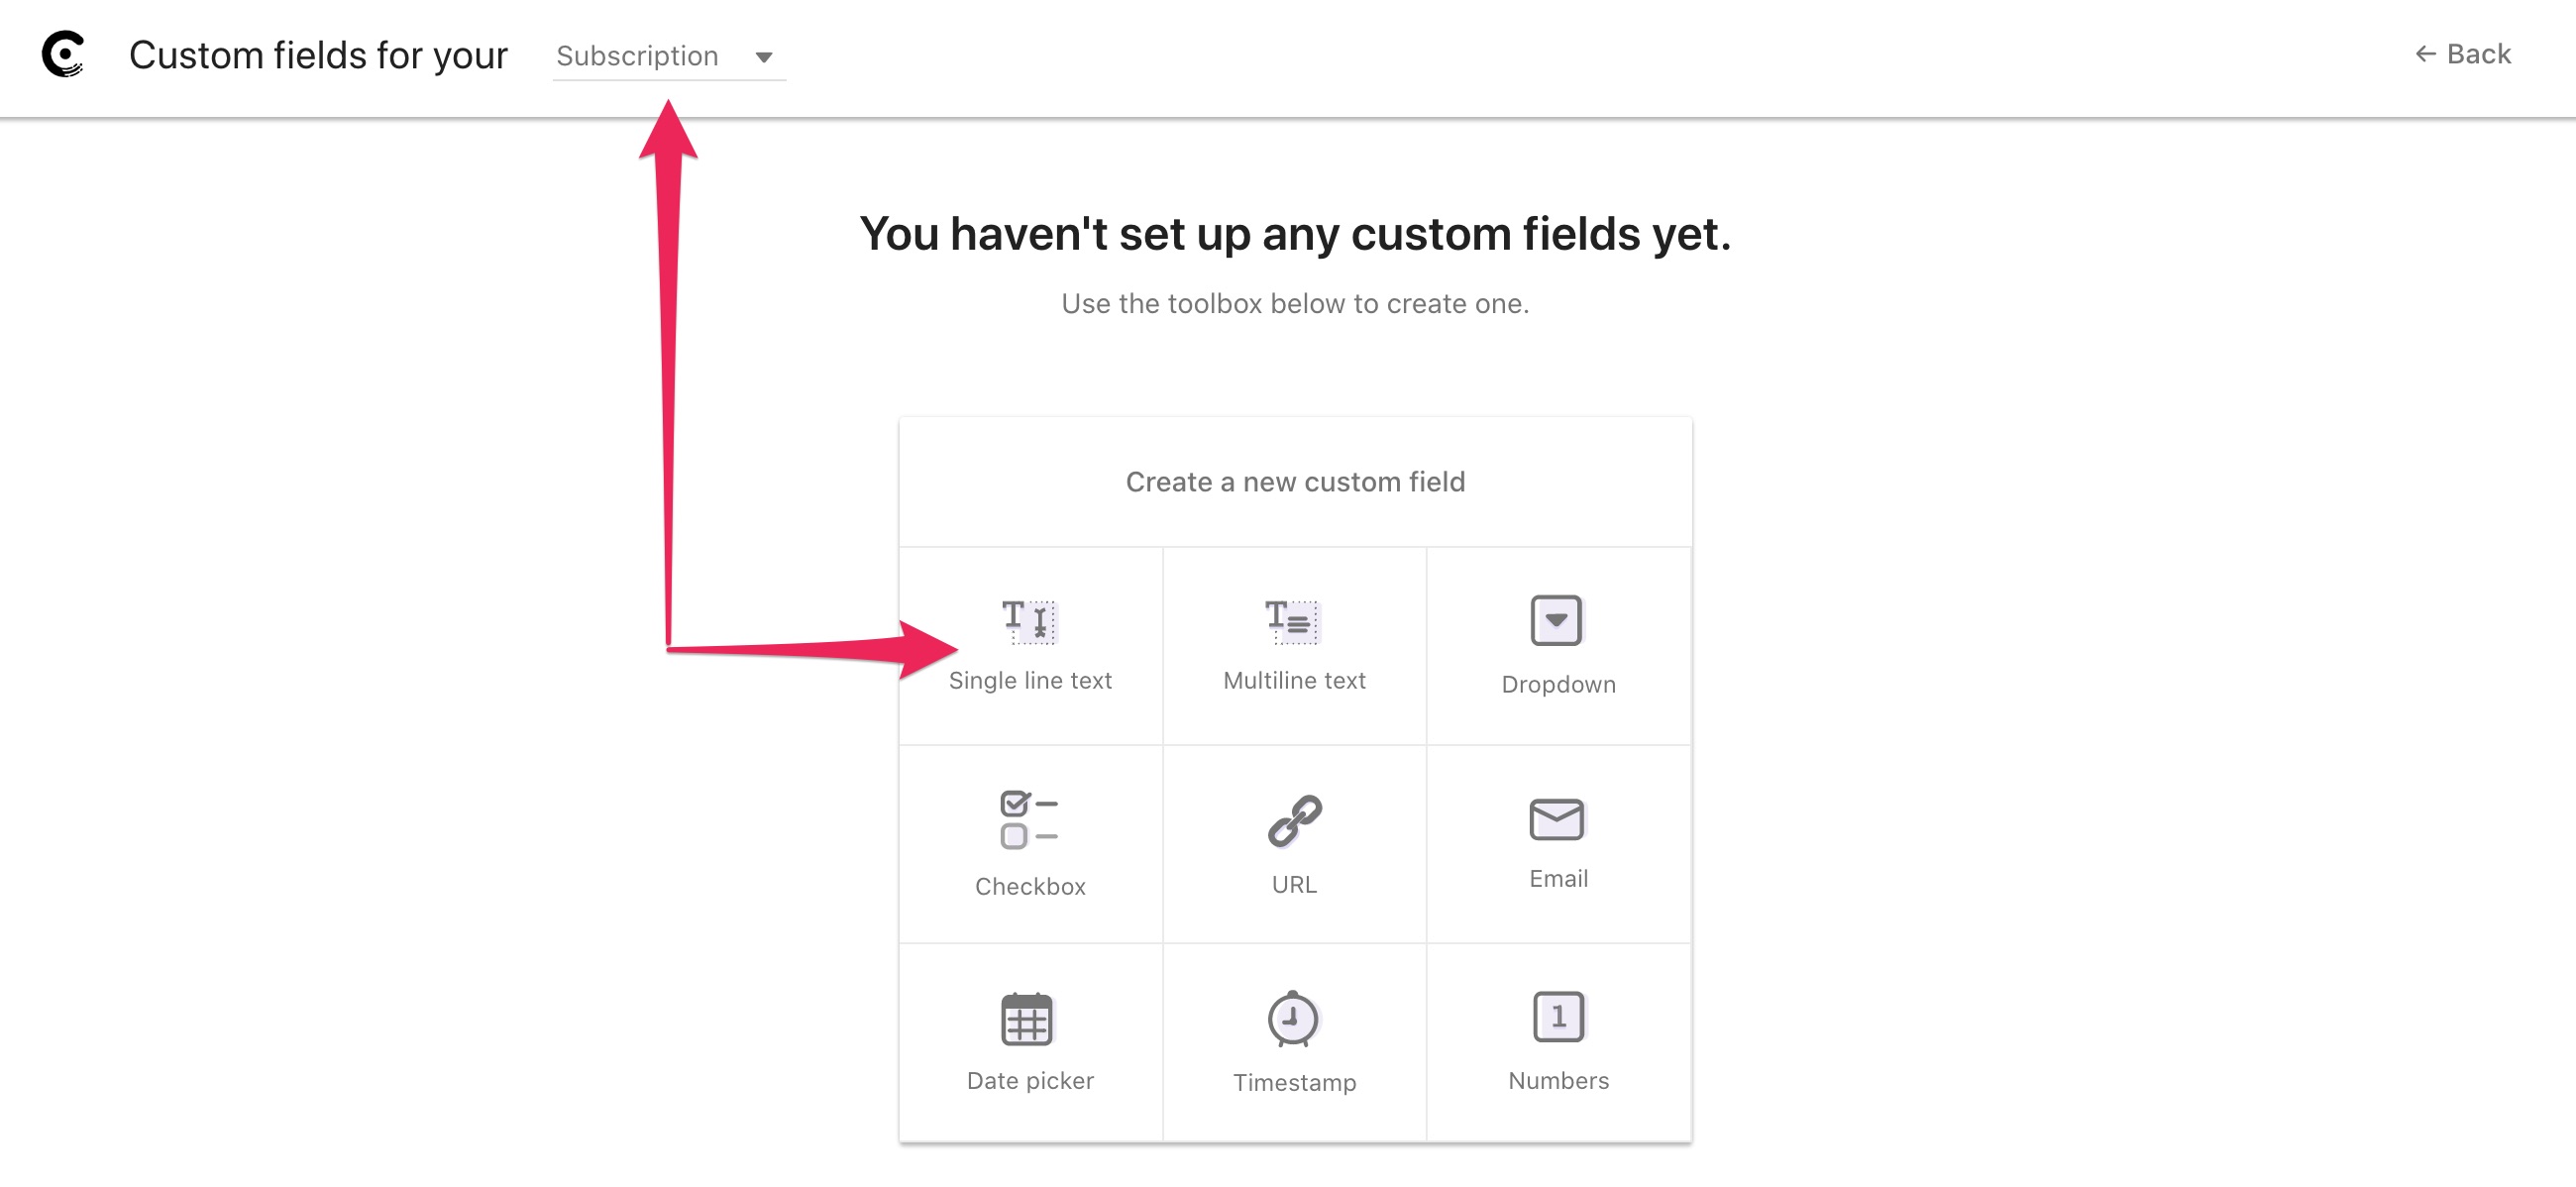
At the top of the screen, use to dropdown to select Custom fields for your Subscription, then select Single line text.
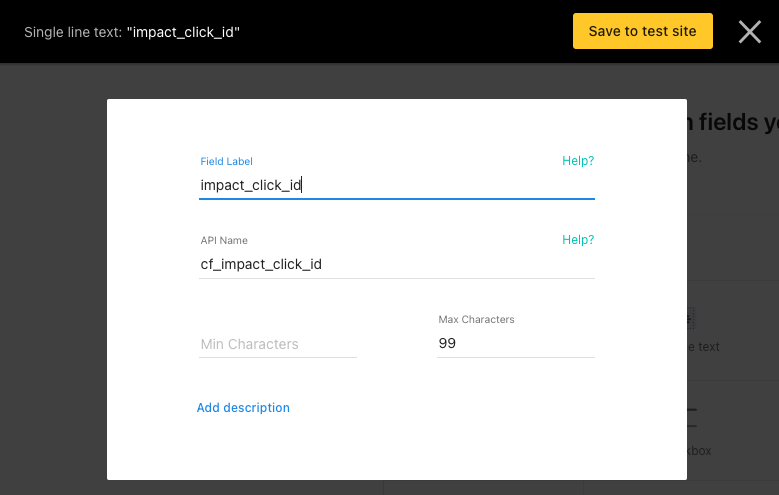
- For Field Label, enter
impact_click_id. Leave all other fields to their default values and select Save to site.
💡 Example
The example below indicates the JavaScript to add to your subscription checkout page to ensure that every >new subscription record gets the
impact_click_idvalue added to the subscription custom field:1 <script type="text/javascript"> 2 (function() { 3 const cbInstance = Chargebee.init({ site: "<site_subdomain>" }); 4 const checkoutButtonElement = document.querySelectorAll("[data-cb-type=checkout]")[0]; 5 const product = cbInstance.getProduct(checkoutButtonElement); 6 ire('generateClickId', function(clickId) { 7 product.setCustomData({ cf_impact_click_id: clickId }); 8 }); 9 })(); 10</script>
Multiple checkout buttons?If you have multiple checkout buttons on the same page, you’ll have to loop through the array returned by
document.querySelectorAll("[data-cb-type=checkout]")function instead of selecting the first position. In each iteration, you must set theimpact_click_idfor the product.
Integration setup
Step 1: Create a Chargebee API key
Chargebee API KeysRefer to Chargebee Docs to learn how to create a read-only API key, or follow the steps below.
- In the left navigation menu of your Chargebee account, select Settings → Configure Chargebee.
- Next to API Keys and Webhooks, select API keys.
- On the API Keys and Webhooks screen, select Add API Key.
- In the Create an API Key modal, select Read-Only Key.
- For the next step, select All, name the key Impact, then select Create Key.
Step 2: Configure the integration
- Access the impact.com impact.com Integration Partner Portal.
- On the dashboard under Platforms, select Chargebee.
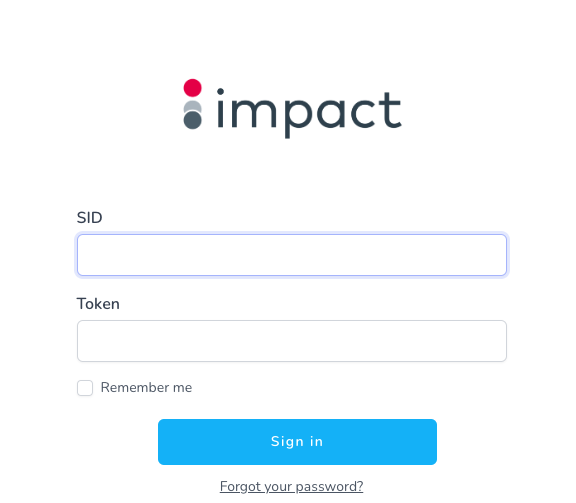
On the login screen, enter your impact.com API Account SID & Auth Token.
- Refer to the callout below for your Account SID & Auth Token.
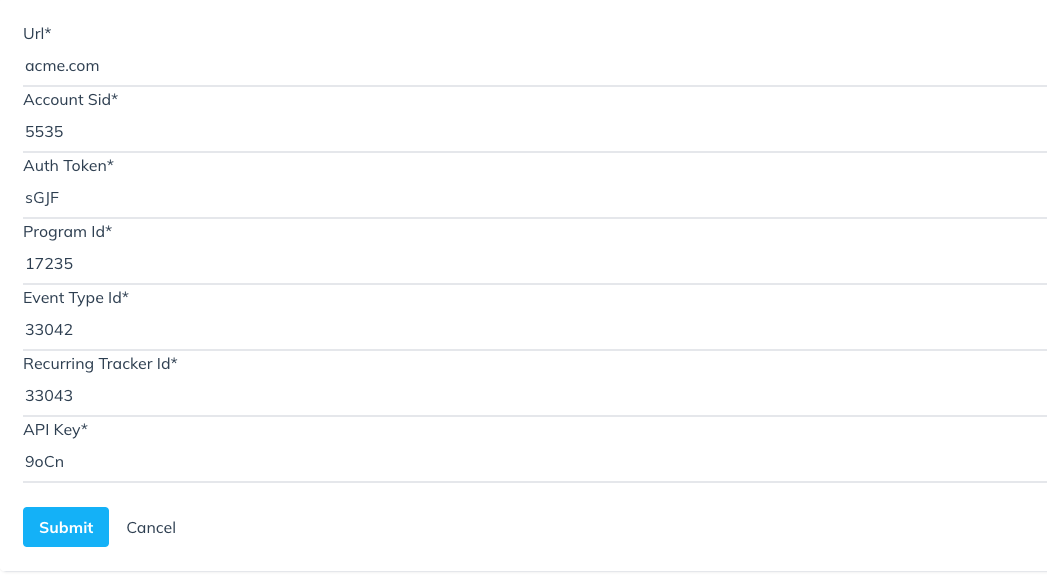
Enter your impact.com info in the fields.
- Refer to the callout below for your Account SID & Auth Token.
Select Submit.
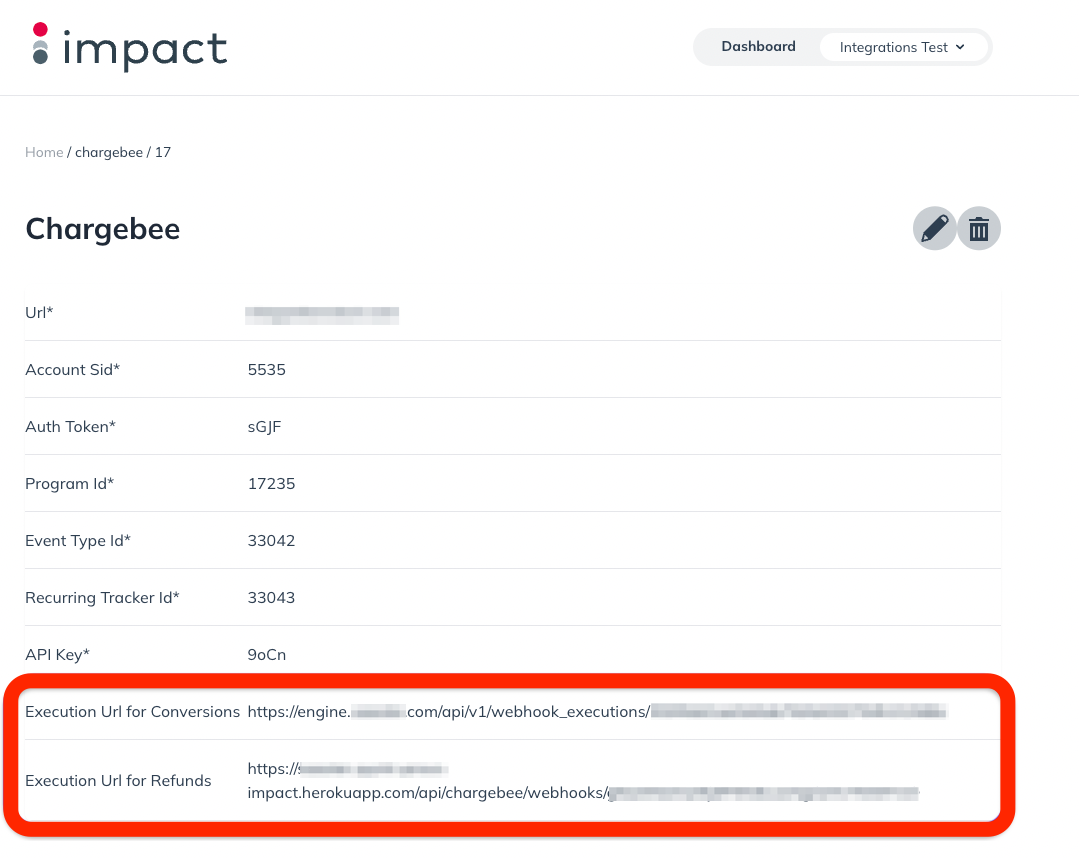
- The portal will display the information you submitted and generate two Execution URLs — one for conversions, and other for refunds. Save your execution URLs somewhere safe — you'll need add these to your Chargebee account.
impact.com Account Info Cheat Sheet
Not sure what your account info is? Refer to the table below:
| Field | Description |
|---|---|
| Impact Account SID * | In the impact.com platform, from the top navigation bar, select [User profile] → Settings → API and copy your Account SID. |
| Auth Token * | In the impact.com platform, from the top navigation bar, select [User profile] → Settings → API and copy your Auth Token. |
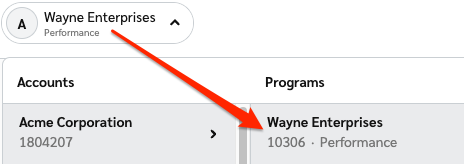
| Program ID * | In the impact.com platform, select your brand name in the top-left corner. Your Program ID is the numerical value under the program name. |
| Event Type ID * | In the impact.com platform, from the top navigation bar, select [User profile] → Settings → Event Types. Copy the number in parenthesis next to the name of the event type. |
| Recurring Tracker ID * | In the impact.com platform, navigate to your Event Types. Copy the number in parenthesis next to the name of the Recurring Subscription event type. |
Step 3: Create Chargebee webhooks
Create a webhook for "Payment Succeeded"
- In the Chargebee navigation menu, select Settings → Configure Chargebee.
- Go to the API Keys and Webhooks section, then select Webhooks.
- On the Webhooks screen, select Add Webhook.
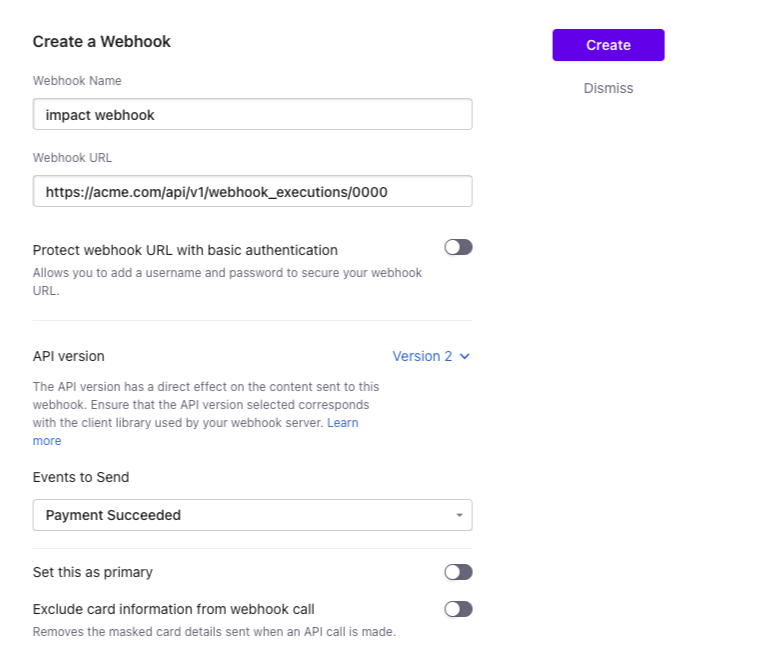
- For Webhook Name, input Impact Conversion Webhook.
- For Webhook URL, input the Execution URL for Conversions you received from the integration partners portal.
- Ensure Protect webhook URL with basic authentication is [Off].
- For API version, select Version 2.
- For Events to Send, use the dropdown to select Payment Succeeded.
- Leave the remaining options [Off], then select Create.
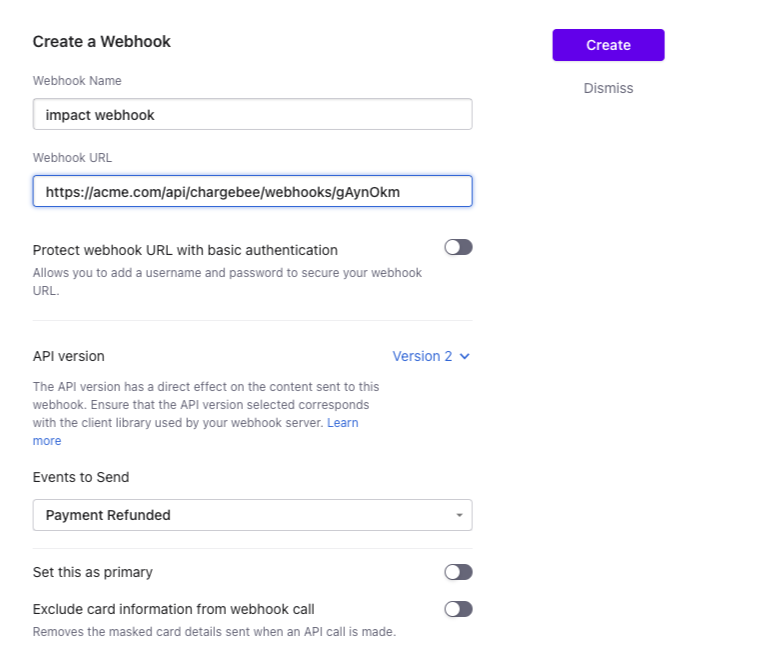
Create a webhook for "Payment Refunded"
- In the Chargebee navigation menu, select Settings → Configure Chargebee.
- Go to the API Keys and Webhooks section, then select Webhooks.
- On the Webhooks screen, select Add Webhook.
- For Webhook Name, input Impact Conversion Webhook.
- For Webhook URL, input the Execution URL for Refunds you received from the integration partners portal.
- Ensure Protect webhook URL with basic authentication is [Off].
- For API version, select Version 2.
- For Events to Send, use the dropdown to select Payment Refunded.
- Leave the remaining options [Off], then select Create.
NoteYou can enable the Exclude card information from webhook call as this will not impact the tracking integration.
Conversion and Refund Reporting
Payment Succeeded
When a Payment Succeeded event takes place in Chargebee, the request is sent to impact.com with the following data mapping:
| impact.com Parameter | Chargebee |
|---|---|
| CampaignId | taken from integration settings |
| ActionTrackerId | taken from integration settings |
| IntegrationSource | Impact_Chargebee_Plugin |
| ClickId | content.subscription.cf_impact_click_id |
| EventDate | timestampToISO(invoice.finalized_at) |
| OrderId | content.invoice.id |
| CustomerId | content.customer.id |
| OrderPromoCode | content.invoice.discounts[0] |
| CurrencyCode | content.transaction.currency_code |
| CustomerEmail | content.customer.email |
| ItemSku{i} | content.invoice.line_items[].entity_id |
| ItemCategory{i} | content.invoice.line_items[].quantity |
| ItemQuantity{i} | content.invoice.line_items[].description |
| ItemSubTotal{i} | Calculated from various attributes |
Payment Refunded
When a Payment Refunded event takes place, a request will be sent to impact.com. After one hour has passed (to ensure a valid initial conversion), impact.com will process the refund request, with the following data mapping:
| impact.com Parameter | Chargebee charge.refund parameter |
|---|---|
| EventTypeId | taken from integration settings |
| Reason | OTHER |
| ItemSku{i} | content.credit_note.line_items[].entity_id |
| ItemQuantity | Calculated from various attributes |
| ItemSubtotal | Calculated from various attributes |
| OrderId | content.invoice.id |
Updated 17 days ago

