
Integrate with nopCommerce
Note: Integrating with nopCommerce is in QAThe impact.com integration with nopCommerce is currently in QA. Should your experience not match the guide below, please reach out to your CSM (or contact support).
nopCommerce is an open-source eCommerce platform based on Microsoft's ASP.NET Core framework and MS SQL Server Database. It provides a catalog frontend and an administration tool backend, allowing shopping cart creation.
Integration Limitations
- This integration was built by nopCommerce, so questions that arise from support or bugs raised will need to go to nopCommerce. You can reach out to impact.com directly and we will share your query with nopCommerce, but we cannot promise any delivery times for queries.
Setup Instructions
Step 1. Log in to your nopCommerce account
- Access the impact.com app by replacing yourdomain with your company-specific domain in this URL: https://yourdomain.nopcommerce.com/Admin/Impact/Configure.
- Please reach out to your CSM (or contact support) if you need help with logging in.
Step 2. Add your impact.com credentials
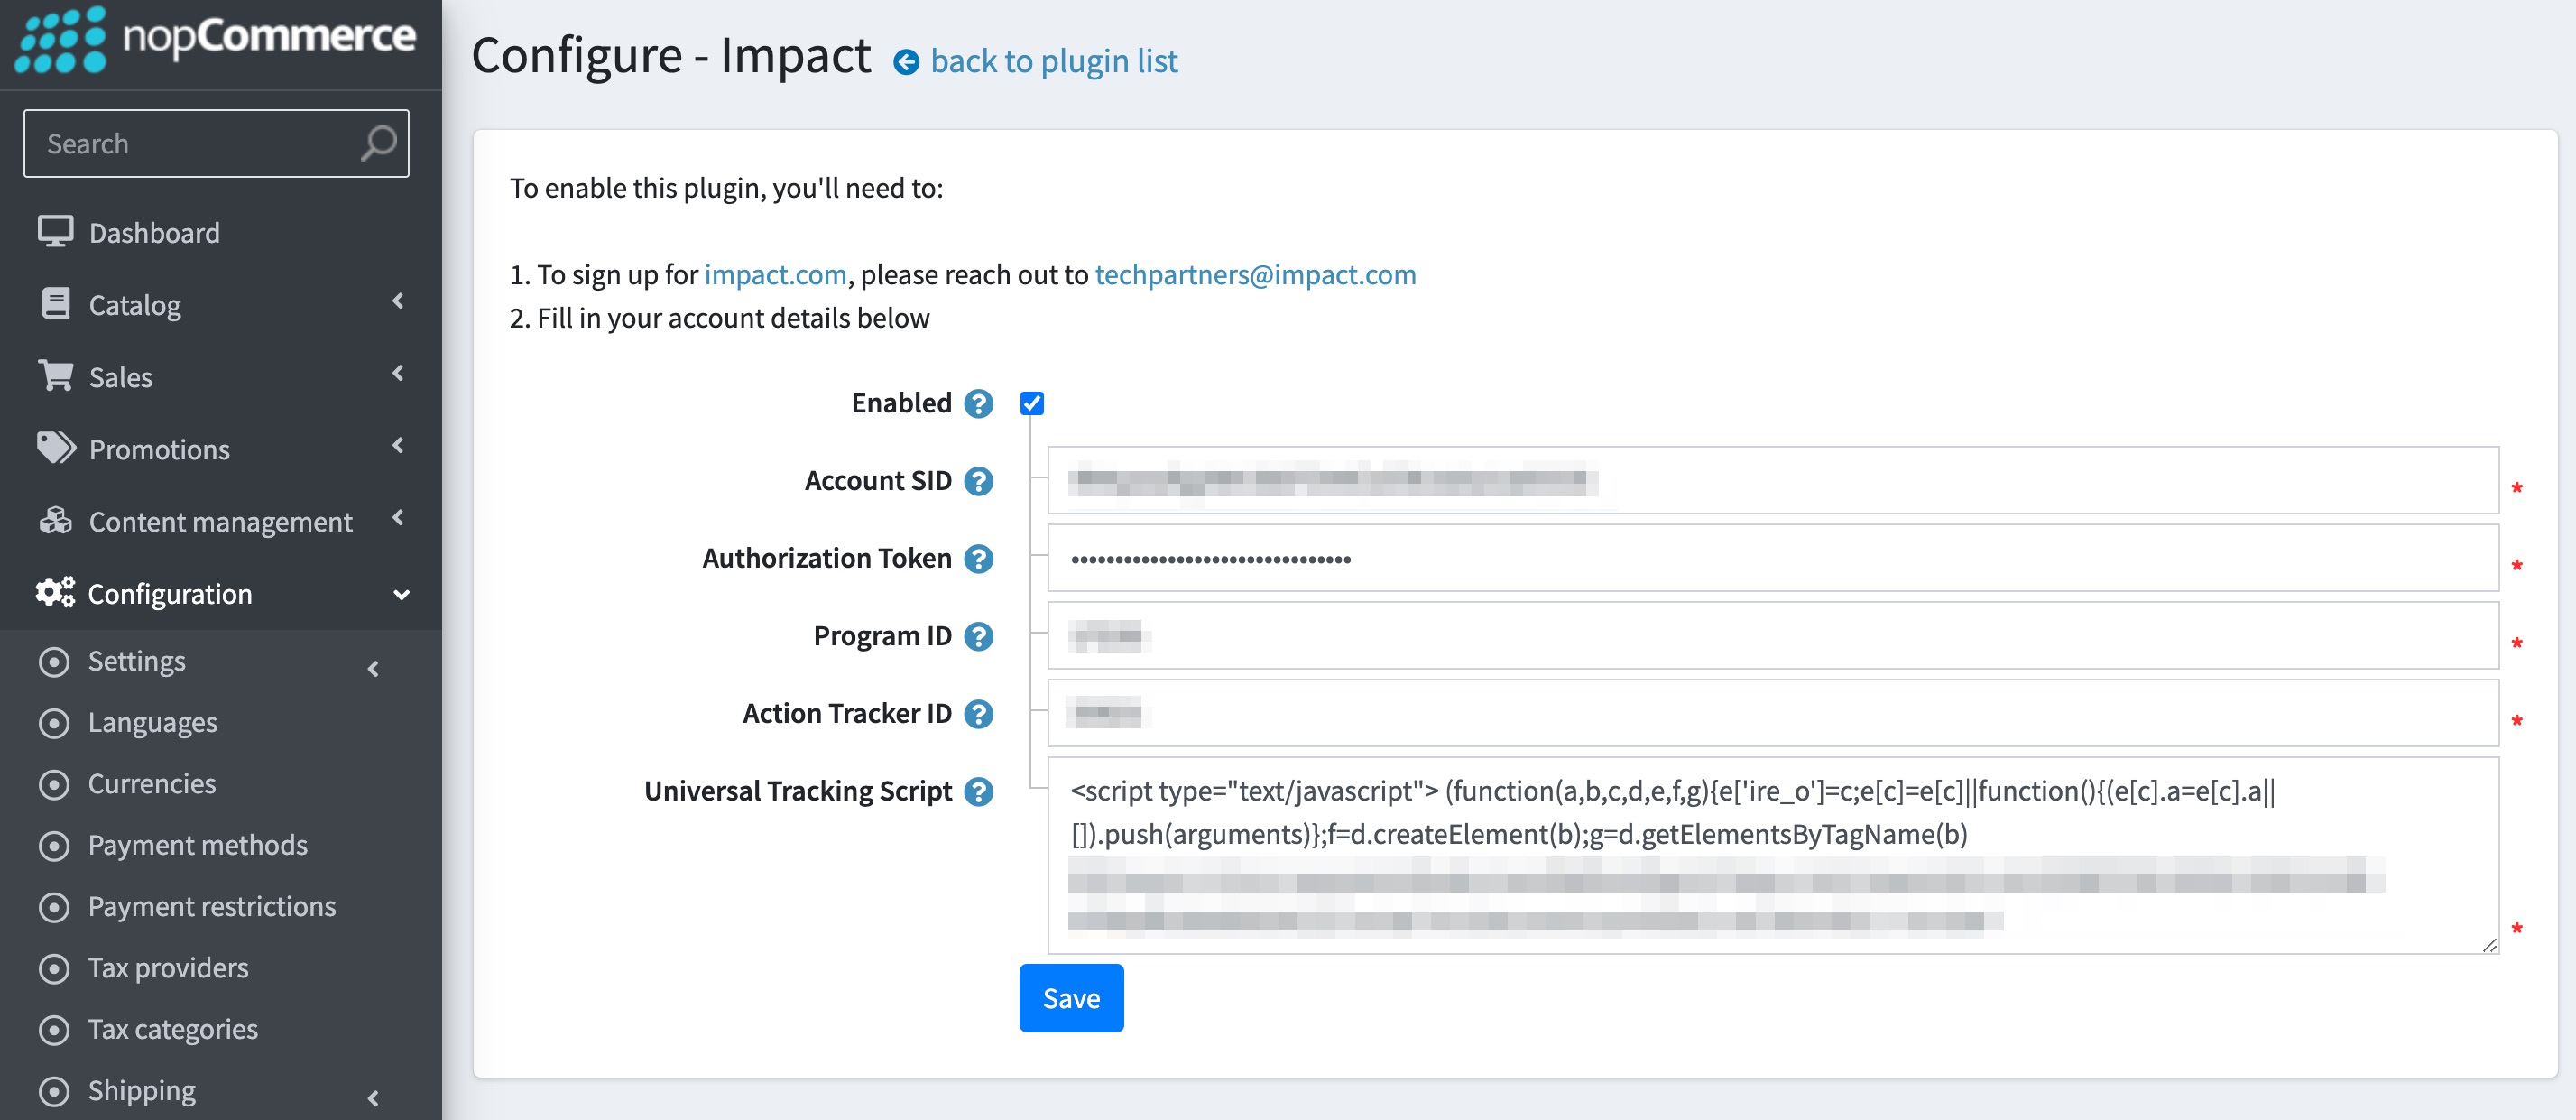
- Fill in the relevant account data on the Configure - Impact screen: Account SID, Authorization Token, Program ID, Action Tracker ID, and Universal Tracking Script. Refer to the account data table below to easily retrieve this information.
- Select Save. You'll receive confirmation that impact.com has been installed.
| Field | Description |
|---|---|
| Impact Account SID * | In the impact.com platform, from the top navigation bar, select [User profile] → Settings → API and copy your Account SID. |
| Auth Token * | In the impact.com platform, from the top navigation bar, select [User profile] → Settings → API and copy your Auth Token. |
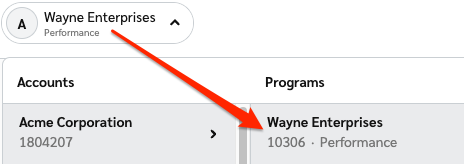
| Program ID | Enter your Program ID value. To find this value, select your brand name in the top-left corner of the impact.com app. Your Program ID is the numerical value under the program name. |
| Sale Event ID * | In the impact.com platform, from the top navigation bar, select [User profile] → Settings → Event Types. Copy the number in parenthesis next to the name of the event type. |
| Universal Tracking Tag (UTT) | In the impact.com platform, navigate to your UTT and copy the entire unique code snippet. |
End-to-End Testing
Once the impact.com app is fully installed, you can begin end-to-end testing to ensure everything is working properly. Learn how to proceed with End-to-End Testing.
Updated 3 months ago