Integrate with Shopify & Klaviyo
impact.com's Shopify & Klaviyo integration lets you post partner-driven actions to your Klaviyo account to get the most out of your email and SMS messaging workflows.
Prerequisite
Shopify requires sites hosted on its platform to have the Customer Privacy cookie banner enabled. EMEA-based storefronts will need customers to opt in for consent to be tracked.
Use Cases
Once this integration is in place, you should be able to do the following in Klaviyo:
- Create a segment to identify profiles that match filters in the information that you've uploaded.
- Create a flow, which is an automated message that is sent, based on a definition that you specify.
Klaviyo Steps
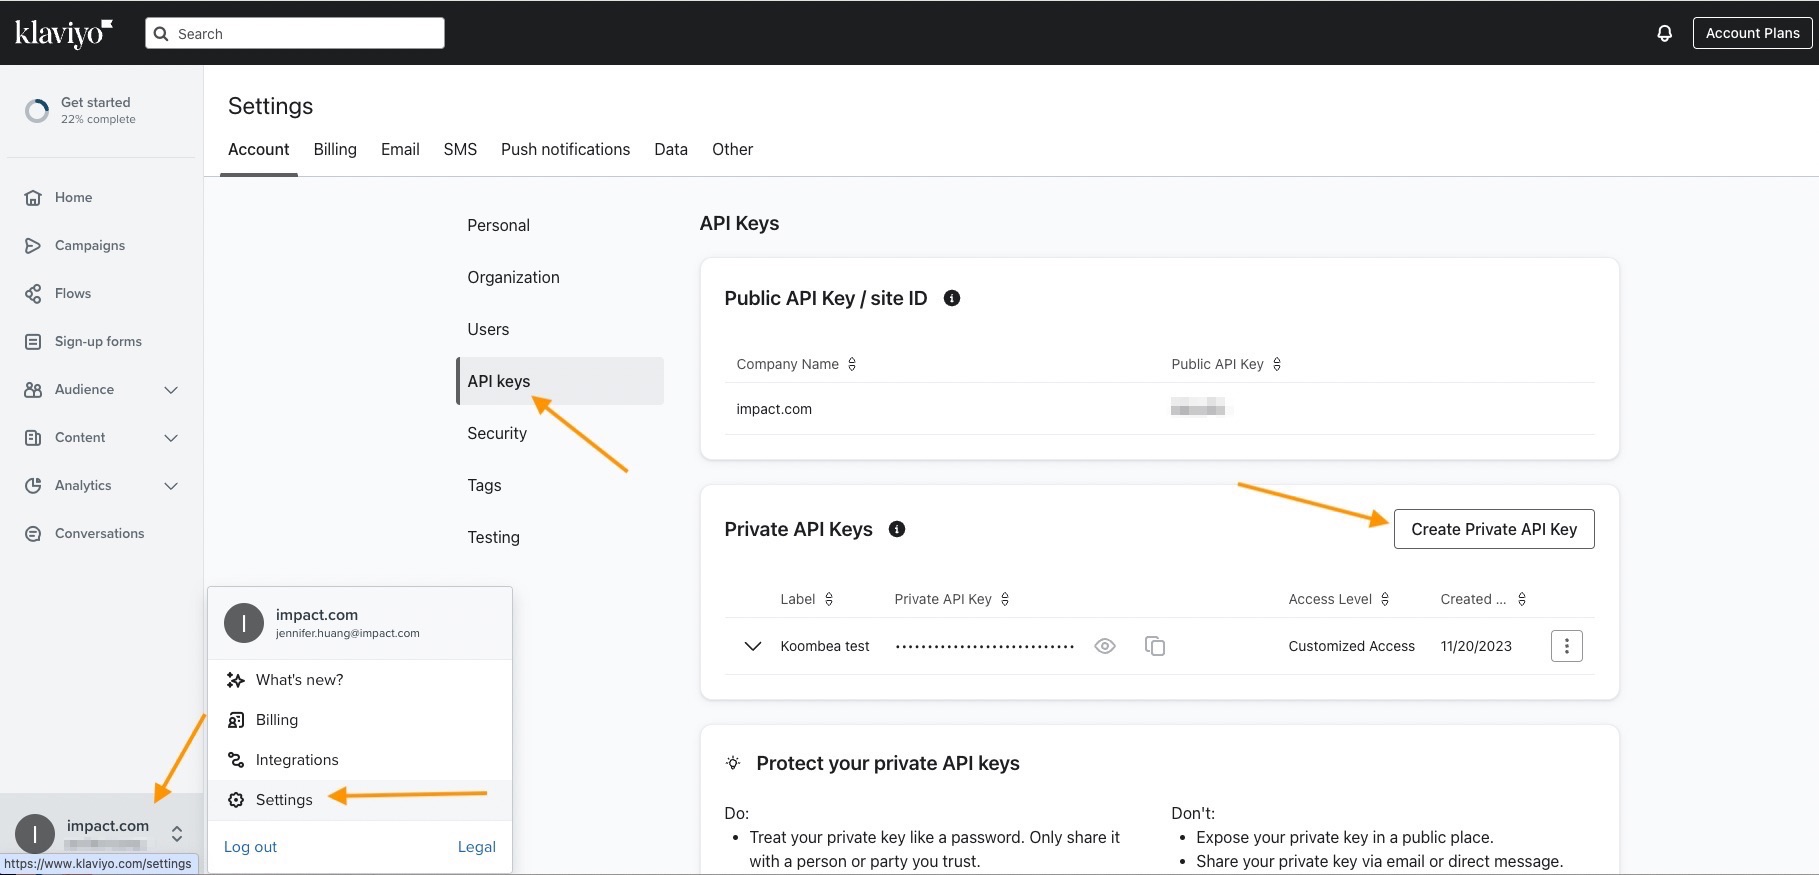
- Login to your Klaviyo dashboard and select your Username on the bottom left corner, then select Settings.
- Next, select API Keys, then Create Private API Key.
- Name your impact.com integration private API key and grant full access to these API scopes:
- Accounts
- Events
- Profiles
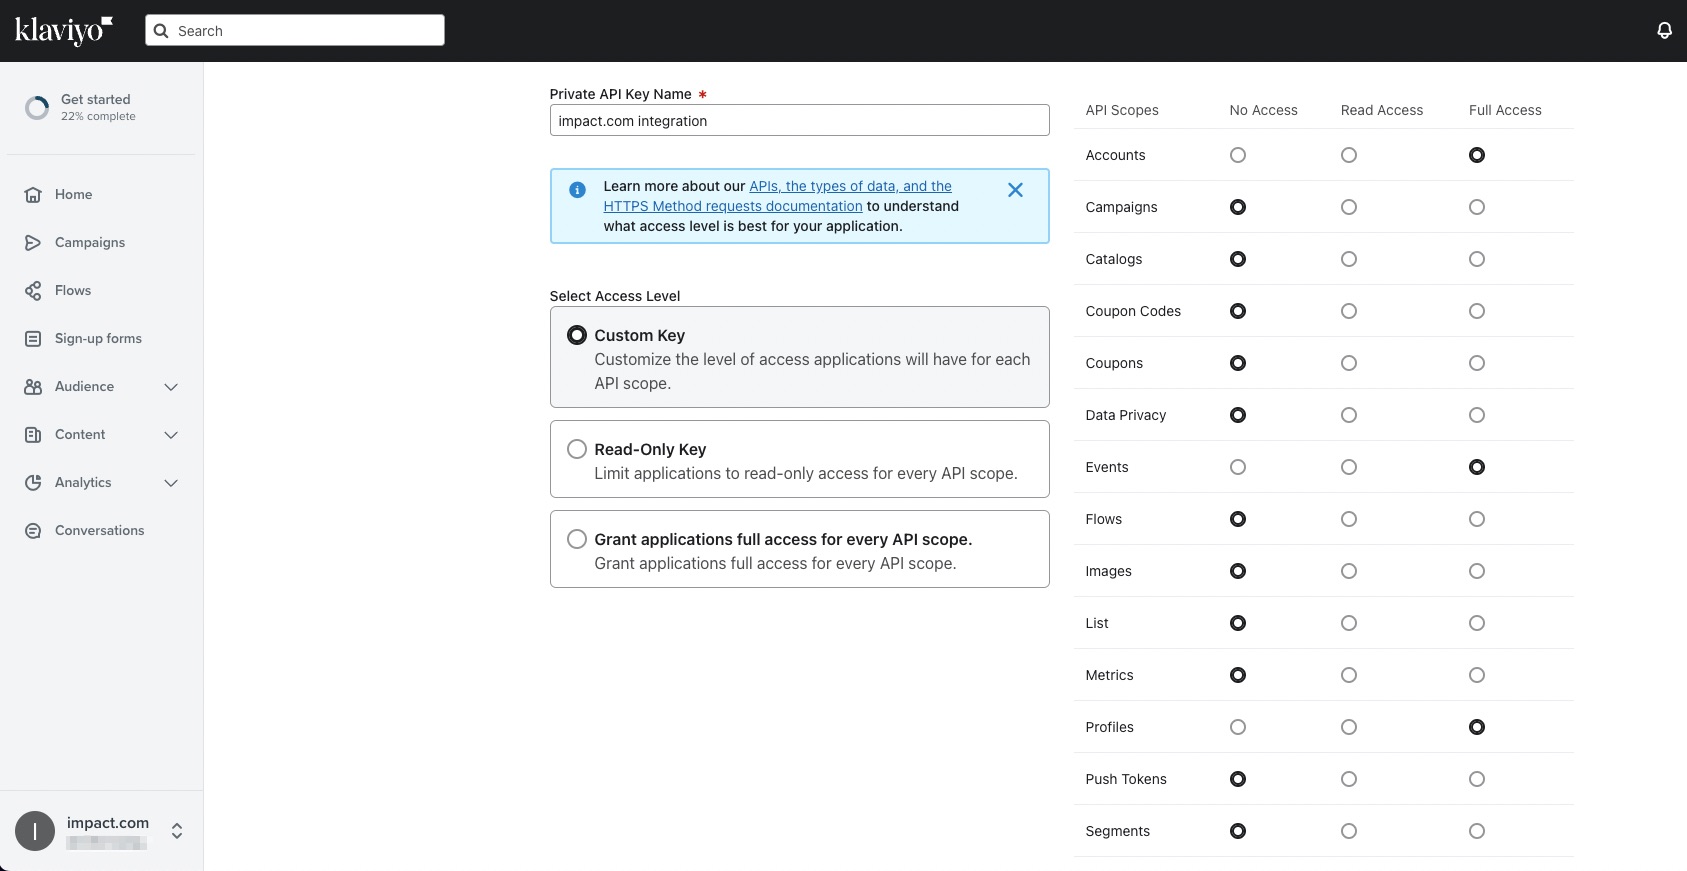
- Create the API key and save it. You'll use it in the next section.
Shopify Steps
- Install the impact.com Shopify app and ensure that the Klaviyo settings have been enabled by an impact.com integration specialist. Reach out to your CSM (or contact support) to help you with this step.
- Once the required setting has been enabled in Klaviyo, the Klaviyo Settings tab will become available in the Shopify app.
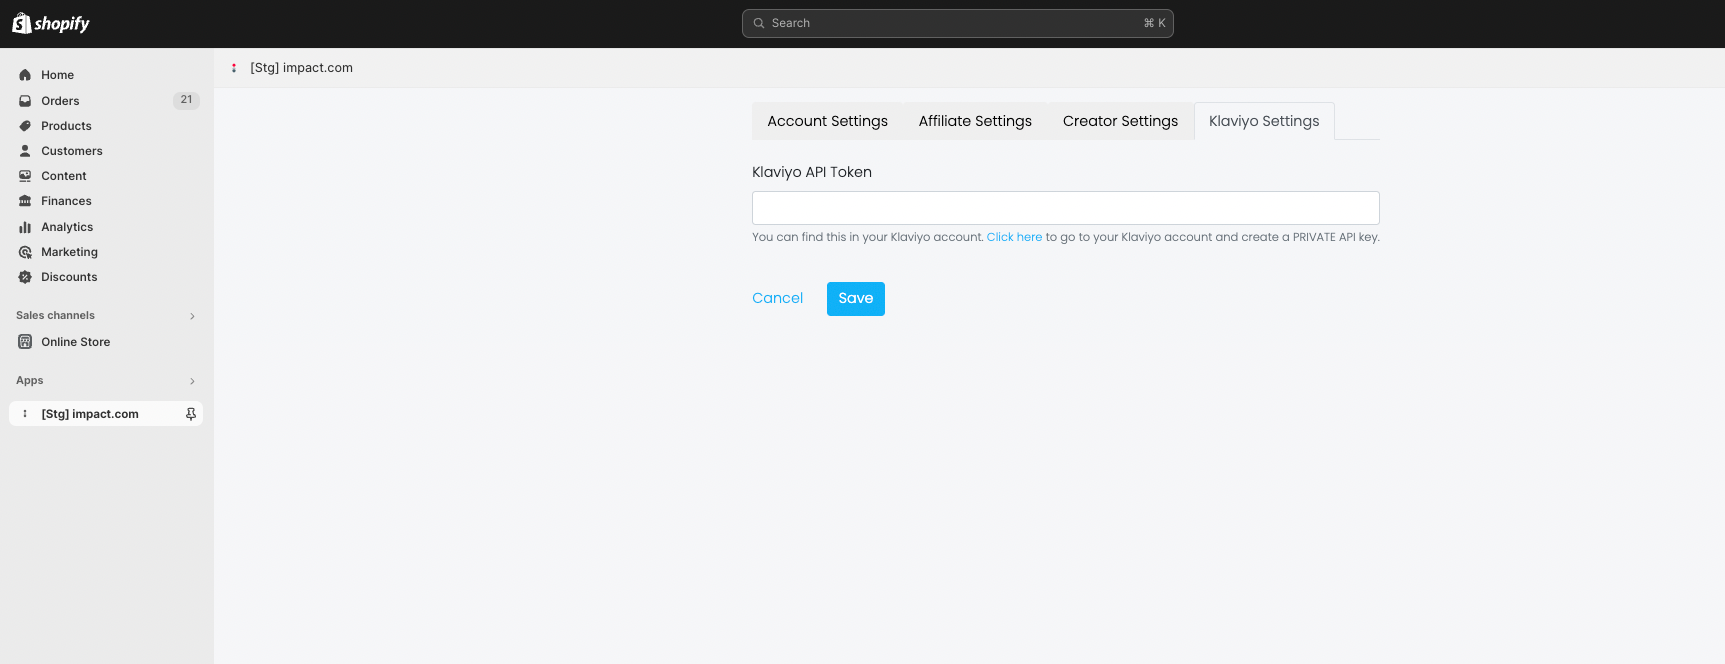
- Enter the Klaviyo private API Key (created in the Klaviyo steps above) into the Klaviyo API Token field and select Save.
- Your Shopify sales data will now begin to be associated with your Klaviyo user profiles so that when a sale occurs on the Shopify store, the Klaviyo user profile data will be reported to impact.com’s Conversion API, along with sale event data.
impact.com Steps
The last part of completing the integration setup is configuring the Event Postbacks on impact.com. This part ensures that when a partner-driven action is tracked on the impact.com platform, we also create the event in your Klaviyo account. Learn more about Configuring Postbacks.
- From the left navigation menu, select
[Menu] → Settings. On the left, under Technical, select Event Notifications. - Under Action Lifecycle Events, select the
[Edit] icon to edit the settings:
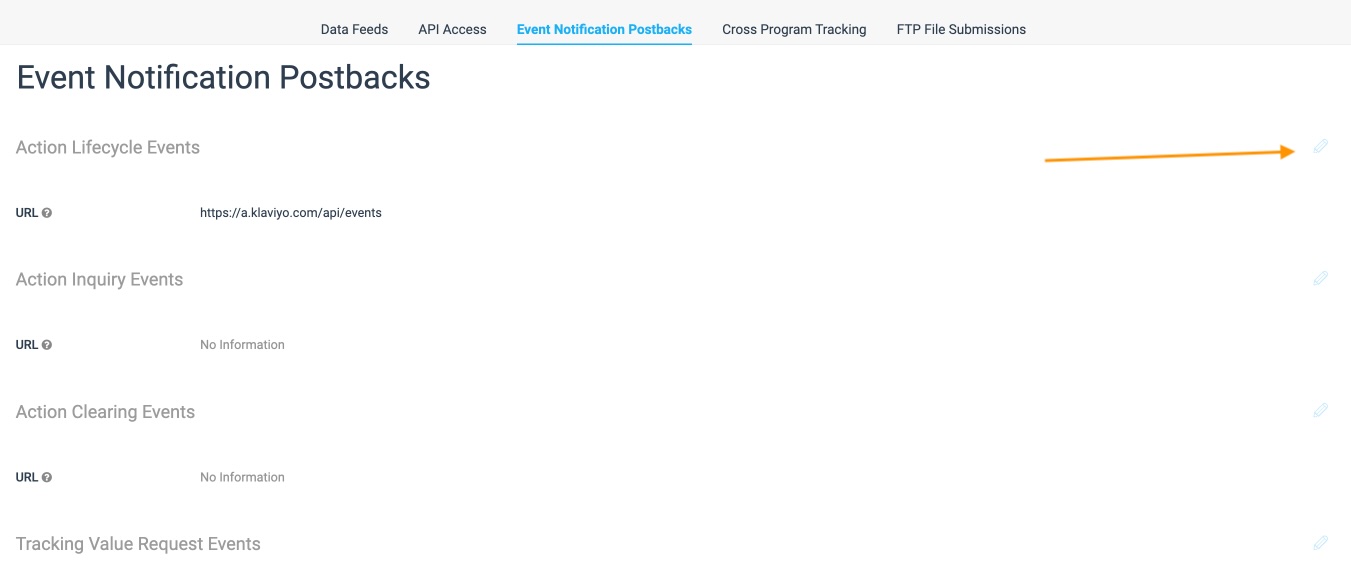
- Configure the postback settings:
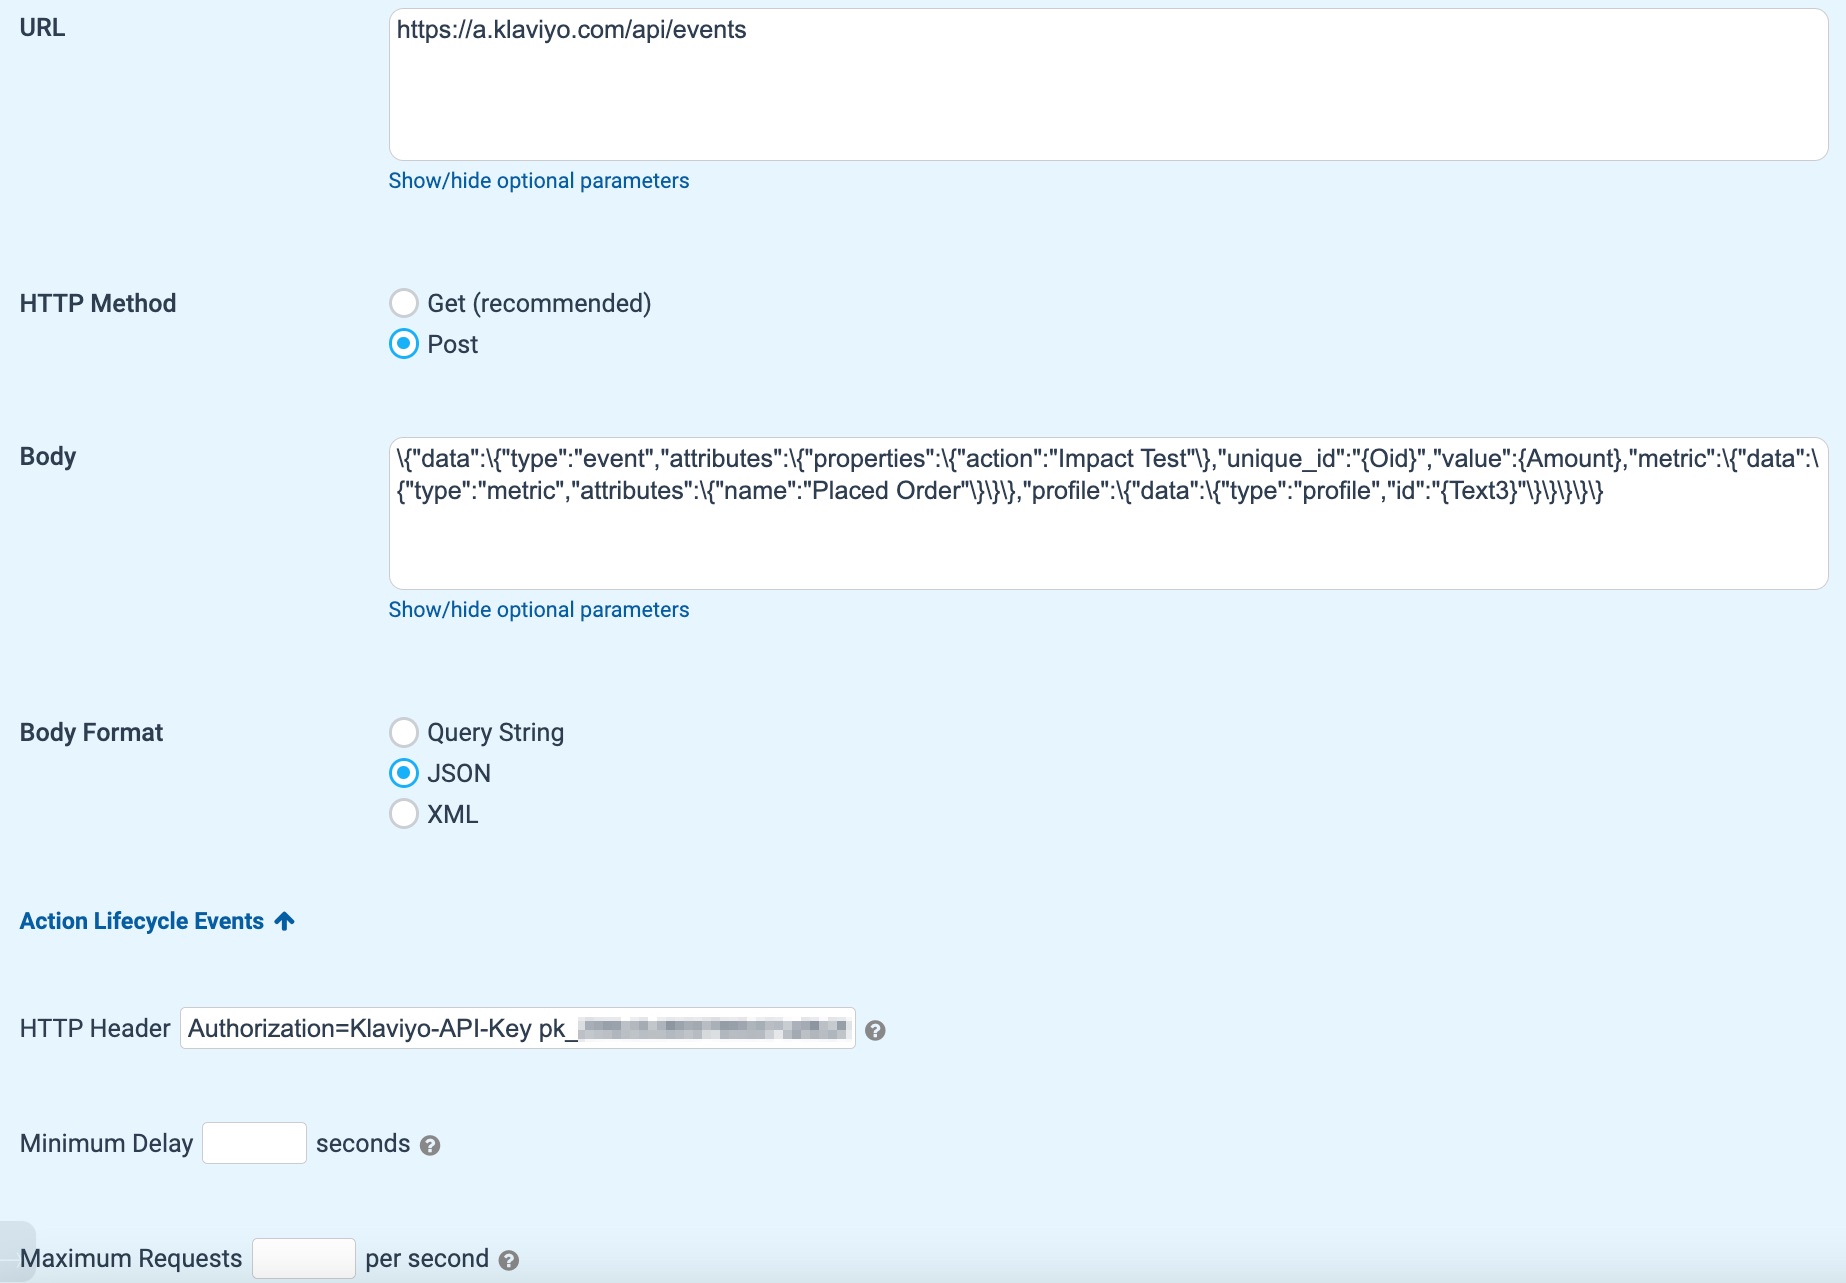
Field Configuration URL https://a.klaviyo.com/api/events HTTP Method Post Body {"data":{"type":"event","attributes":{"properties":{"action":"Impact Affiliate Sale","Impact_Partner_Payout":"{Payout}","Impact_Partner_Name":"{MediaPartnerName}","Impact_Partner_ID":"{MediaPartnerId}"},"unique_id":"{Oid}","value":{Amount},"metric":{"data":{"type":"metric","attributes":{"name":"Placed Order"}}},"profile":{"data":{"type":"profile","id":"{Text3}"}}}}} Body Format JSON HTTP Header Select Action Lifecycle Events to expand the settings further. Authorization=Klaviyo-API-Key pk_xxxxxxxxxxxxxxxxxxxxxx;revision=2023-10-15
pk_xxxxxxxxxxxxxxxxxxxxxx should be the private API key that you’ve previously entered in the Impact Shopify app.We recommend that an impact.com implementation specialist review these settings with you and assist you with editing or setting up any additional fields.
The syntax and format of the request body above are taken directly from Klaviyo’s Create Event endpoint. This suggested format merely lists the minimum requirements. There are many variations in the action data that can be sent to Klaviyo.
Updated 11 months ago
